The following article came about, as did the film, (posted below) because several friends and relatives presented me with non-working stick vacuum cleaners and this one had not only the worse problem but also for which there was no solution on-line. I therefore, thought it would be a good idea to share my solution as this video has become not only one of my most popular recent uploads but also has through the comment section, shown me how many people there are out there encountering similar problems. However, it has to be stressed that with this particular Electrolux Ergorapido, the cleaner had been so badly treated that the damage was serious but could still be fixed. I would just add that I am not a vacuum cleaner specialist but being an engineer am always interested in taking things apart and trying to understand why they work...or in this case...why they don't!
Problem and Initial Deductions
It had already been established that the batteries were OK because when the vacuum cleaner was turned on the three LED tell-tale lights on the Detachable Hand Unit momentarily show 'orange'. However these lights then immediately go out and the single 'red' light above them comes on. This to me is indicative of a motor experiencing 'overload' due to some mechanical resistance. From my point of view, this is an excellent sign because it signifies that the fault is not electronic and therefore much more likely to be reparable!
NB By detaching the Hand Unit from the main body of the vacuum cleaner it was obvious that the fault lay in the former not in any of the moving components of the main vacuum cleaner body, such as the sweeping brushes. It is important to establish this, as one of the other main problems with these devices which I have come across both from relatives and through comments on my YouTube channel, is with debris such as cotton thread or similar wrapped around the brushes. This will cause the rotating brushes to seize and indicate an overload in a similar way.
Tools
Taking the Hand Unit Apart
The first item to remove is the Dust Collector, this is done by pressing the two release catches on the side of the unit. Put the Dust Collector to one side.
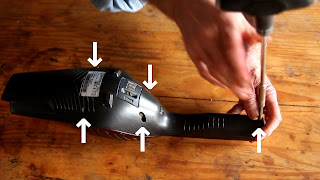
Turn the Hand Unit over and locate the 5 screws holding the casing in place and remove them with the Torx.
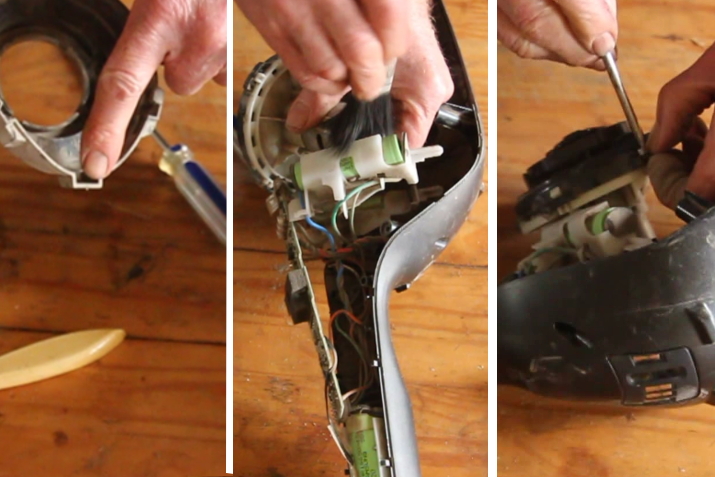
Using the screwdriver blade in the penknife, gently prize open the Case which is held in place with snap connectors along either side.
When you open it, there will probably be a layer of dust. You will need to clean this out before you proceed to the next stage. I used the paint brush for this.
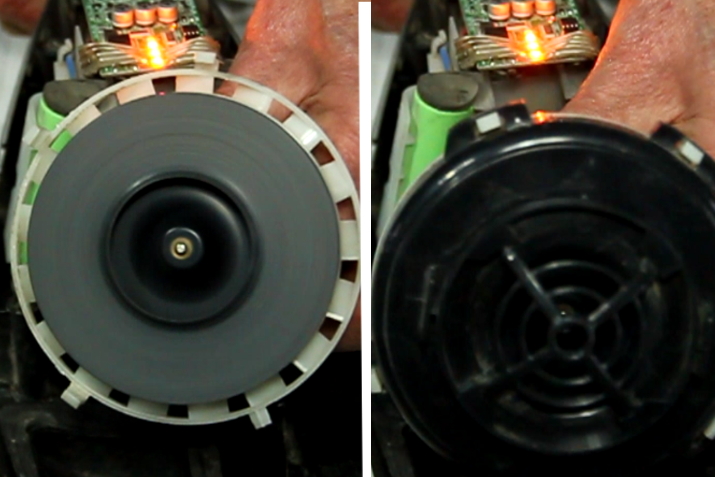
Peel back the Rubber Housing on the front of the Motor to expose the Fan in its plastic housing.
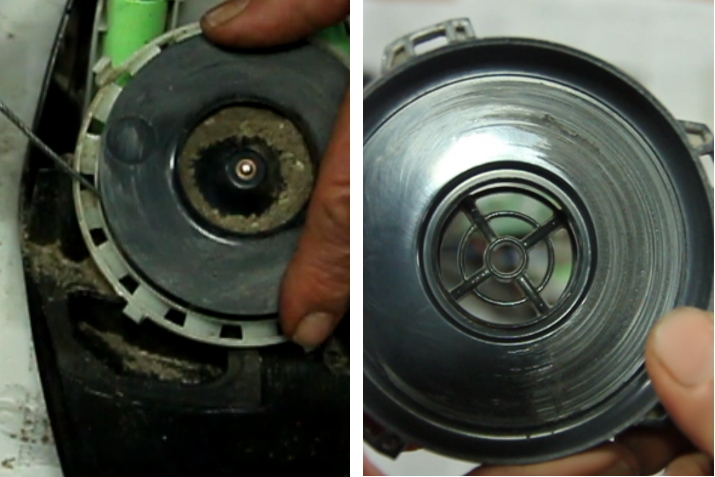
I gently inserted a screw driver into the side of the fan to check that it turned - it did not! Therefore, I deduced that this was the reason why the motor was overloading.
Using the screwdriver remove the two screws holding the Circuit Board in place.
Remove the Rubber Housing from the Fan making sure to remember the orientation for how it fits back together.
Using the paint brush remove as much dust as possible from the fan.
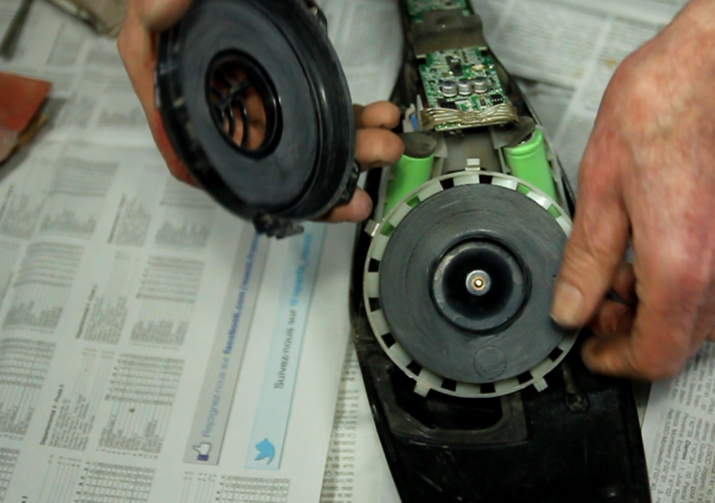
Using the flat bladed screw driver or pen knife gently prize apart the snap connectors that hold the Fan and the Fan Housing together.
Diagnosis & Repair
As you can see on the inside face of the Fan Housing and on the face of the Fan itself the plastic is deeply scored, suggesting some foreign material has collected inside the Fan and actually fused the Fan and its Housing together
Once there is no load on the fan we can now see that the fan turns and the motor engages. There is a little vibration but not much and this may be caused because the scoring to the face has slightly altered the balance of the fan.
Remove as much dust as possible, I used a vacuum cleaner and then a cable tie to clean between the vanes of the fan to remove all the caked on dirt and dust and there was a lot!
It was evident once the Fan and Fan Housing had been fully cleaned that what ever had damaged them had only done this to part of their surfaces. I then used coarse and fine sand paper to smooth down the areas that had been scored.
Reassembly
Check to make sure it is running OK. Reattach the front of the Fan Housing and then reassemble. Do not forget to secure the circuit board prior to attaching the outer cover (because I did!!).
Check again to make sure the vacuum cleaner is running. Prior to putting on the empty dust collector, remember to clean the filters, using the method as recommended in the manual.
If you have enjoyed this article and found it interesting then share it with your friends on social media or suchlike. Please also feel free to ask questions and or make comments and if you found this helpful and would like to support this site you can always
Cheers, Andy
Additional Information

RELATED ARTICLES
Rewire , Repair, Install a Vintage Chandelier
My cousins found this beautiful vintage
chandelier in a dumpster/skip in Manhattan and carried it all the way
over to us in rural France. It needed TLC and
 How to Convert your Washing Machine to Pedal Power 1 - The Basic Model (Front-Loader)
 How to Convert your Washing Machine to Pedal Power 2 - Modifications (Front-Loader)
We’ve exhibited this machine on many occasions and the most frequent
comment from spectators has been ‘let’s see you spin dry now!’...read more
 Convert Your Washing Machine to Pedal Power Part 1 - Getting Started (Top-Loader)
The most frequent reasons for machine failure is of an electrical or electronic nature. Neither of these preclude using it, as long as the drum is watertight. Even if you don't already own a broken machine I can guarantee that..read more
Wheelbarrow rebuild using pallet wood


