Showing posts with label saving money. Show all posts

Windows for Free Part 1 - Recuperating glass windows and how we used them to glaze our entire house.

When we decided to renovate our house here in France we chose to recuperate as much material as possible. This because it would be in keeping with both our philosophy and the building; there was such a huge and freely available supply and we were working to a budget.  In particular, when looking at glazing we needed quite a volume for the provision of interior light, which was in low supply due to thick walls and few openings.

Recuperating glass to reglaze a home


Introduction


Our house is over 300 years old and is a vernacular longère so it was never intended to have glass windows. Each of these Celtic long houses follow the same architectural pattern, in having adjacent, alternate human and livestock accommodation, so these openings were meant either to give light to the cooking area or air to the animals/birds. At night these were closed with wooden shutters and on cold Winter days with sacking. 

Rexcuperating glass and glazing our home

As someone had, many years before, lived in one of the human habitations, now our kitchen, we actually had one window, this dating from around the 1930s. So when we came to the question of windows and doors, we just decided to ask at the local joiner’s, where we had already observed the rows of discarded items, some thirty to forty of them, piling up in his car park.

Where to recuperate glass windows

On enquiring with the proprietor we discovered that the windows were waiting to be dumped or burnt. The majority of his business was in making and fitting double-glazed units  and those in the yard were the ones he had removed from the houses prior to installation. The proprietor was so happy that we wanted to take some away for our own use, his means of disposal being to take them to the tip (for which he would pay a fee) or he would have to take them into a nearby field  and burn them! So we loaded the car up with our chosen windows and over the course of  the next few months collected several dozen units, the majority of which were exotic wood and double-glazed. Additionally, I encouraged neighbours and friends with projects of house restoration and greenhouse construction to visit this company and furnish themselves with the valuable free resource, one completed project being the verandah-style greenhouse (read more)

Recuperating glass window and doors to glaze a house

One thing I should make clear with these windows, is that  most of them were in perfect condition, some of the French windows even having keys - apparently many people just wanted to change to UPVC! As expected, very few windows had any frames as these were broken in their removal. 

Some supplies of windows and doors we obtained as they were being removed, these, often from nearby towns were elegant old windows with hand-made glass and fine astragals. 
where and how to recuperate glass windowsrecuperated windows in our homeRecuperated glass - French doors


For people of our philosophy the opportunity of recuperating these windows and constructing a (softwood) frame to fit them was and is a perfect way of using ‘waste’. Furthermore once the proprietor of the company realised what we needed, he and his men not only tried to carefully retain the frames, handles and keys but also kept a look out for specific sizes and shapes of window and doors!

Greenhouse made from recuperated glass windows

As mentioned above, another way we got windows was to watch for old houses in the area being refurbished. This way we directly approached the building firms as they were loading the windows up to dump or burn. We were able to obtain some really elegant windows this way, many of which we used for our glass greenhouse (read more).

The one and only drawback of recuperated double glazed units

There is however, a problem with old double-glazed units, like the ones we used in our sitting room. Unfortunately, last year we noticed that one of the windows was beginning to get  ‘foggy’ and by the summer of this year it was apparent that it must be changed. By a stroke of good fortune I had recuperated this window with several others from the same contract and in our stable where we store the pallet wood planks I unearthed the twin of the now translucent window. 

Double glazed recuperated window and door

In the next blog post I will be sharing how to prepare and fit a recuperated window into an existing frame but in the meanwhile here is a film showing our recuperated windows in use in our house and garden.


Thanks for dropping by and please feel free to share this article, comment, ask questions and if you'd like to be assured of getting the next post, then sign up to follow this blog.

All the best, Andy

© Andy Colley 2014

How to dismantle pallets to obtain free carpentry wood.

Once you have your pallets (see Where and how to collect pallets if you have had trouble locating them), then the next stage is to dismantle them so as to obtain the maximum amount of quality wood for carpentry. In the following article I will be looking at how to do this in different ways depending on the type of pallet and the fixings used to put it together.

How to take pallets apart for maximum useable wood

INTRODUCTION


The following is a list of tools I use to dismantle pallets.

Tools:
Claw hammer
Lump hammer
Flat-bladed screwdriver
Awl
Bolster chisel
Wrecking bar/ pry bar
Crowbar  130cm
Crowbar    90cm
Lengths of  timber approx 50mm x 75mm
Hacksaw
Nail punch
Pliers

selecting pallets to use in carpentry
Note: I tend to carry the wrecking bar and the 90cm crowbar in the back of the car when I’m out looking for pallets because I frequently find pallets with vertical backs attached, used for the transporting of glass, bathroom and general furniture and these obviously need to be removed from the pallet so as to fit in or on the car.


Safety wear :
Work gloves
Safety boots
Safety glasses


METHOD


Block Pallet aka Four Way Entry Pallet


parts of a block pallet


The first thing to do with your pallet when you’ve got it out of the car is look underneath it and see if the nails attaching the planks are visible - if they aren’t, great!

block pallet
This means that the planks (top deckboards/slats) are attached with short nails and should prise off quite easily. If you can see nails they will invariably be hammered flat to the underside of the stringer board. This means you’ll have to straighten the nail before prying the slat off - this will require a little more effort but if the wood looks good quality, it’s worth the effort.


How to take a pallet apart

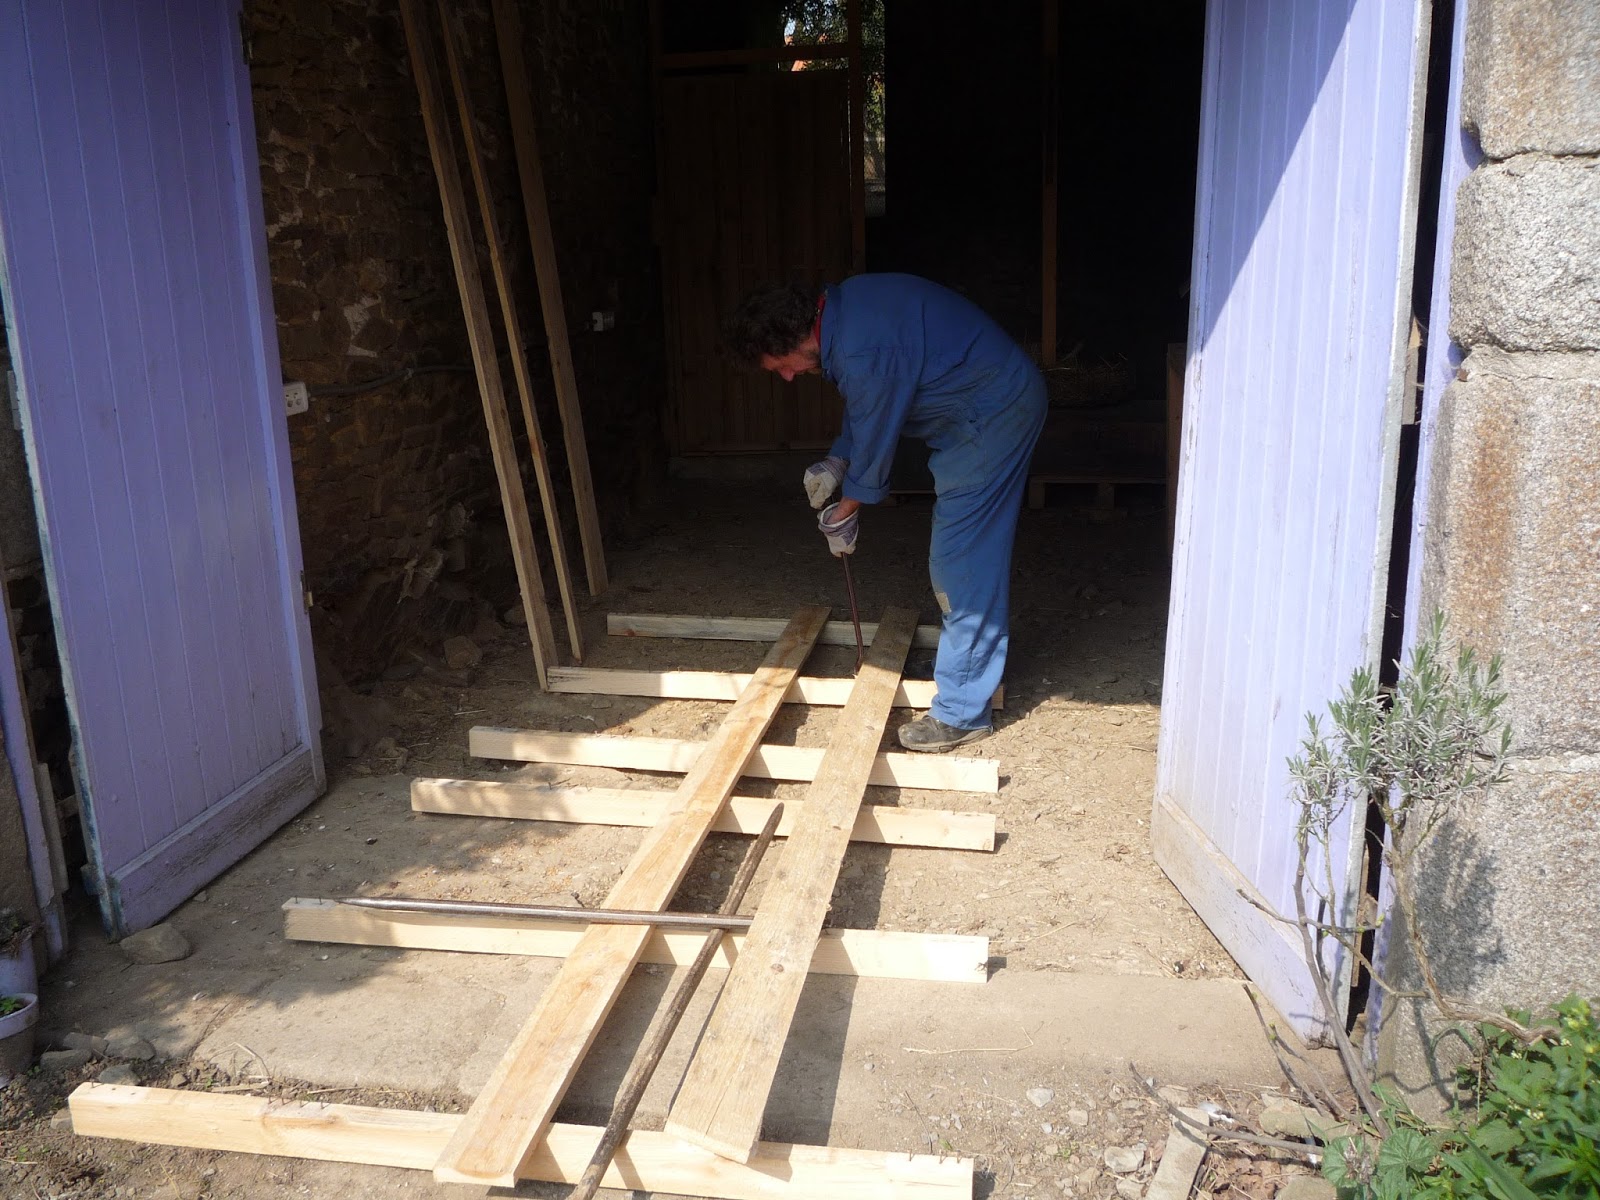
For the former (straight nail) pallet you need to turn the pallet right way up and put the flattened tip of your prybar under the edge of the slat as near to the nails as possible, if  you have the longer crowbar then use it as a fulcrum by laying it on the pallet behind the prybar otherwise use a piece of timber. If you don’t use an introduced fulcrum then as you prise the slat off, your crowbar will be resting on the adjacent slat and may dent it or at worst, break it.


strategies for taking a pallet apart

I will not try to prise the outermost  and centre slats using this method as these are nailed into the blocks and are much more likely to break. For these it is better to lay the pallet on its edge and use the bolster chisel between the block and the stringer board. 

tips on taking palllets apart

When the chisel is hit with the lump hammer, you may feel the nails ‘give’ and the end of the wrecking bar may be inserted in the gap produced to prise the block away.  This will only happen on your ‘butter-side-up’ days and if you are fortunate to have this happen you will end up with the nails sticking up dead straight. 
 
how to take pallets apart for carpentry

You should then be able to knock these nails back through the slats so as to be able to use the claw hammer or the wrecking bar to grip the nail heads and pull them out.

stratefges for taking a pallet apart

If you are unsuccessful with the above method, then you will need to use a hacksaw to saw through the nails. Keep the saw blade against the face of the block so as to leave the rest of the nail protruding above the stringer board face. 

 How to take a pallet apart for maximum useable wood

Thus, when all the blocks are removed, the nails can be hammered on their sawn faces through the wood to raise the heads above the slat surface for the claw hammer. If the nails are not proud enough to be hammered through, then they can be driven through using a nail punch against the sawn face.

tips for taking a palllet apart

A more brutal method I have sometimes found effective is, with the pallet on its edge on firm ground, strike the lower edge of the block with the lump hammer, this will often move the block away from stringer board face, I have found this to be particularly effective when confronted with blocks made from composite (they look like chipboard). These composite blocks go to the tip/dump and should not be used in any project (or fire for that matter) as they are bonded with toxic adhesives.

strategies for taking a pallet apart for maximum carpentry wood

Finally, the protruding nails on all of the planks need to be removed using the claw hammer.

screwdriver an awl - tips on taking a pallet apart

With the pallets having the bent over nails holding the top deckboards in place, you need to straighten the nails using the awl and the screwdriver. 

 lifting nail point to take a pallet apart 
Push the point of the awl beneath nail and using the screwdriver as a fulcrum, you can lift the free end of the nail away from the wood. 

straightening nails to take a pallet apart

How to take a pallet apart for maximum carpentry wood 

Straighten it further with pliers or tap it vertically with a hammer. The nail can then be driven out from the underside until the head is clear enough for the claw hammer or pry bar to finish the job.


Because the stringer boards are so heavily nailed and of shorter length, I very rarely consider keeping them and that is why they are the surface against which I use the bolster chisel and the hacksaw..


Now, the only things left nailed together are the blocks to the bottom deckboard. Often these bottom deckboards are in poor condition as they are the workface when the pallet is moved around and hence are often split and dirty and not suitable for most projects.

  how to prise a pallet plank from a block 


I have found that the block can be moved enough to provide a gap for the pry bar by the simple expedient of striking it on the side with the lump hammer. Alternatively, if you have a workbench with a vice on it, you can clamp the block within its jaws and using the deckboard as the lever, lift it off the block. I find this technique particularly useful when collecting the nail-free blocks I use in the insect houses.


DIY insect hotel as a utility box cover

 You can find this project 'An Insect Hotel as a Utility Box Cover' here


Stringer Pallet aka Two Way Entry Pallet


Stringer pallet parts - taking a pallet apart


The stringer pallet is often much easier to dismantle as the top deckboards are nailed into the stringers normally with shorter nails than those into the blocks of the block pallet. 

How to take a pallet apart - Stringer pallet


Removing the top deckboards is the same as previously described except, sometimes, I have found that no matter how careful you are, the nail heads pull through the deckboard and remain in the stringer. 

How to take a pallet apart - difficult nails

how to dismantle a pallet - nailsstragegies for nails - dismantling a palletHow to dismantle a pallet for carpentry wood - nail removal
Tips taking a pallet apart

Remove the nails from the stringer using the pry bar. For some reason I frequently find the nail heads shear off when trying to remove them. If this happens and you still want to use the wood, then clamp each protruding shank of  nail in the jaws of the vice and use the stringer as the lever to pull the nail free. All but the most stubborn nails will succumb to this.

How to take a pallet apart - Stringer

That is all there is to it! You end up with loads of useful wood at a fraction of the cost. I will just repeat what I said in my previous post on choosing pallets, for your own benefit you should only use non-chemically treated pallets.

ippc logo wooden pallet

One note of caution: I have needed to smooth the surfaces of the planks for certain projects and I have sometimes found tiny pieces of wire around the nail holes which can foul the plane or tear the belt in a sander. These pieces are from the pallet manufacturing process where the nails in the nail guns are held together with a wire which comes adrift in the nailing process. So, it is always worthwhile to visually check the wood and then go slowly at first with your tools until you’ve established there is no such contamination in your wood.


how to dismantle pallets to obtain free carpentry wood

Now if you'd like to, sit back and watch the film: 

Thanks for dropping by and please feel free to share this article, comment, ask questions and if you'd like to be assured of getting the next post, then sign up to follow this blog.

All the best, Andy

© Andy Colley 2014

Home-made Guillotine from Scrap Metal - Home-made Tools

Fruit crates are in constant supply in our home and we've used a lot of them in our projects, for storage and chicken nests.

Mother and chick asleep in a fruit crateSnoo - zzzzz - e 

However, many of them end up fit only as kindling and it used to be a weekly chore to break them down.


Introduction


We are very fortunate in that our local organic shop gives us all their unsaleable fruit and vegetables for our poultry. This means that we bring home on average about 8 – 10 fruit crates a week containing produce. What the birds are unable to eat goes into our compost bins so the only thing left over at the end of the week are the empty fruit crates. Those which can not be repurposed, as above, are great for lighting fires but can be difficult to break down. 


Orange boxes or fruit crates

Usually I cut through the staples holding the bottom in place and can then stand on the remaining portion so as to beak the sides away from the corner posts. The problem is, I still need to break the side pieces further so as to fit in our cooker and this I used to do using a chopper at the mid-point or by folding the wood strips using my knee as the fulcrum. The problem is that this is very time-consuming and prone to injury from stray staples piercing working gloves and knees and that is why I came up with the idea of making a hand-powered guillotine similar in design to the paper guillotines used in schools and offices.


How to make a guillotine from scrap metal


Method


I needed a long lever for this device as I was unsure how much effort it was going to take to cut the wooden sides. As I needed to hold the material to be guillotined in place whilst cutting, I estimated the optimum length from the pivot point to the operating handle to be about 80cm (this being the distance from my left hand on the table top to my right hand prescribing an arc around my right shoulder with the arm bent at 90°). My left hand would be near to the blade pivot point where the maximum cutting force would be.


RSJ for home-made guillotine


I had a steel RSJ that was left over from a project about 15 years ago and it was of a suitable size as the base of the guillotine. 


recuperated scrap steel for home-made guillotine


For the blade I recuperated a mild steel strap hinge from some old shutters. This was 50cm long.

I also recuperated from an old window, some half-round steel bar used as part of its locking mechanism.

recuperated steel for home-made guillotine


To make the blade I first cleaned off all the paint from the hinge.


welding haf-round bar for home-made guillotine
I then welded the half-round bar to the top long edge of it ensuring that about 20cm extended beyond the end of the hinge so as to function as the handle.

work in progress homemade guillotine


I welded another length of half-round bar to this so as to produce a nearly round handle. I then used a hand-held grinder to dress the welds and to grind a cutting edge on the blade. I ground this edge to a fairly obtuse angle of about 85° .

work in progress DIY guillotine


I drilled a13mm hole for the pivot at the end of the blade.


The RSJ I was to use for the base was 94cm long and was to function with the web of the beam being horizontal and thus the hole for the pivot was drilled in the flange at a distance of 49cm from the beam end. 


tree stump anchor for home-made guillotine


The remaining 45cm of the beam was to rest across the upper face of a tree-stump I recuperated from the beach about 20 years ago.


work in progress home-made guillotine


This would be anchored to the stump using a chain loop. Thus the cutting portion of the guillotine hung over the nearside of the stump so as to enable the fruit crates to slide into position near to the pivot point without obstruction.


Prior to attaching the blade to the base I ground the rounded edge of the RSJ’s flange, from the pivot point, flat so as to furnish the second cutting edge against which the blade would cut.


work in progress home-made guillotine

Once I had tested the efficacy of the guillotine, I finished the device off by attaching a wooden handle over the ‘round’ bar  extending from the top of the blade and fitting a ‘stop’ so as to prevent the blade from passing beyond the RSJ and I also cut off the end of the hinge .


testing the cutting ability home-made guillotine

'stop' for home-made guillotine
adding wooden handle to home-made guillotine


Fitting a ‘stop’  
and 
a wooden handle


Does it work?


The effort to cut the crates up is minimal as long as the blade is kept close against the flange edge of the RSJ (functioning like scissors).. The mass of the blade contributes greatly to its cutting ability as the momentum it has in the cutting stroke helps it to cut through the wood. 

Occasionally I have found that the base needs to be more securely attached so it does not rotate due to the sideways force exerted in maintaining the cutting action of the blade against the flange edge.

Further uses


angle of blade - home-made guillotine

I have subsequently used this guillotine to chop straw for a project currently under way. All I needed to do was change the angle of the blade by just grinding it to a more acute angle. Below is an excerpt from the film, which is included in this blog under the project Home-made storage heater.


Now, if you'd like to sit back and watch the film:


Thanks for dropping by and please feel free to share this article, comment, ask questions and if you'd like to be assured of getting the next post, then sign up to follow this blog.

All the best, Andy

© Andy Colley 2014

RETURN TO GREEN LEVER CONTENTS PAGE FOR MORE ARTICLES