Welcome to the continuation of this project on making the dry toilet seats. If you have just landed on this page, then the first part can be found here.
For the seat itself I had selected some wood planking 140mm x 30mm (5½” x 1¼”) that I had intercepted before being thrown into a skip. Already planed smooth this was ideal. On the very first seat I made (still in use) I used 20mm (¾”) pallet wood and this was okay except it did take some effort to plane it to an acceptable smooth and splinter-free finish.
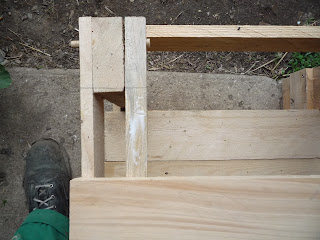
The planks were sawn to length and laid onto the top of the frame. Previously I had marked the centre of the frame with a pencil line and I laid the seat planks for both sides to this line. The seat supports remained clamped to the side frames and hence once in place a line could be drawn on the underside of the seat indicating the supports positions (image at start of article).

Each plank in turn could then be removed, turned over and drilled.
For the seat itself I had selected some wood planking 140mm x 30mm (5½” x 1¼”) that I had intercepted before being thrown into a skip. Already planed smooth this was ideal. On the very first seat I made (still in use) I used 20mm (¾”) pallet wood and this was okay except it did take some effort to plane it to an acceptable smooth and splinter-free finish.
The planks were sawn to length and laid onto the top of the frame. Previously I had marked the centre of the frame with a pencil line and I laid the seat planks for both sides to this line. The seat supports remained clamped to the side frames and hence once in place a line could be drawn on the underside of the seat indicating the supports positions (image at start of article).

Each plank in turn could then be removed, turned over and drilled.
Prior to screwing I'd countersunk the screw holes on the top face of the seat planks and then ran a bead of PVA wood glue on the upper faces of the supports. I also ensured that the front edge of the seat projected about 20mm (¾”) over the front edge of the frame.
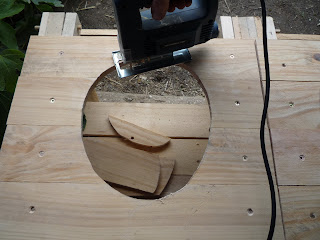
The shape for the hole in the seat I obtained simply by tracing the outline from an existing toilet seat onto a piece of cardboard. Once cut out, this became the template for the hole and could be traced around in the correct position on the seat planking.
When the glue bonding the seat planks to the supports had dried, the holes could be cut using a jigsaw. The buckets were put in place and the alignment was checked. As an additional support for the seat planks I glued and nailed laths of wood on the underside of the seat that were narrow enough not to impinge on the bucket rim.

The upper edge of the hole was rounded, for user comfort and although it could be done with a rasp and sandpaper, I found it much quicker using a router fitted with a roundover bit.
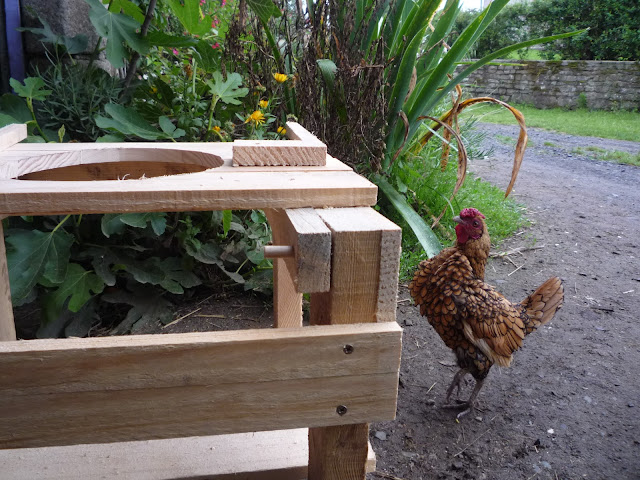
To make the lid I cut 20mm (¾”) pallet planks to length and laid them on top of the seat, the plank at the back flush with the rear edge of the seat. The lid pivoted on the same dowels as the seat thus four ‘L’-shaped support arms were cut.
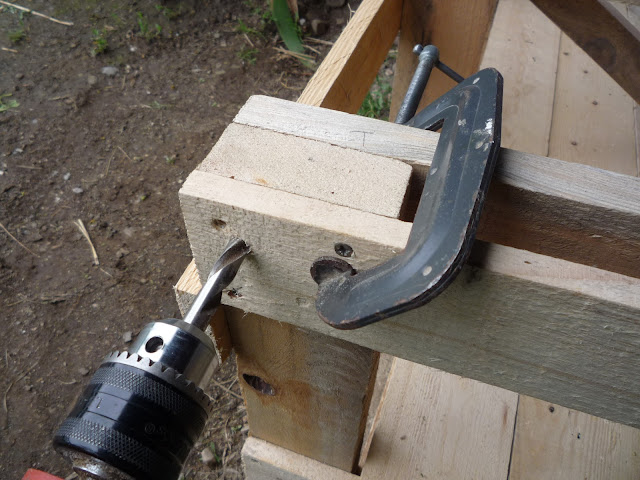
The shorter arm of the ‘L’ was long enough so as to be able to be drilled for the dowel to pass through. The long arm was laid onto the lid planks and the pivot hole in each one was drilled.
To make this operation easier, each arm was held against the inside face of one of the outermost seat supports and the hole was drilled using the previously-drilled holes in the frame and support as the guide. During drilling I used a piece of wood to wedge the arm firmly in place.
NOTE: Because I had drilled and checked the hole alignment in the support frames I knew that the pivot holes were in the same position thus, all of the holes in these arms were drilled through the same guide holes.
Prior to fitting the lid, I nailed planking to the front face of the seat frame and chamfered and smoothed the top edge with a rasp and sandpaper.
With the lid planks in position, each pair of arms were fitted onto their respective dowel and lowered into place. The arms were drilled and screwed to the lid planks.
As
the wall planks are not fixed in place, they can be slid out from their
retaining bars until there is enough of a gap for the seat to pass
through. This means that the seat can be fitted into a cabin not much
wider than itself (about 50mm (2”)).
.. and now if you'd like to, sit back and watch the film of the construction of the seats:
All the best and thanks for dropping by. Please feel free to share this article, comment and/or ask for further information.
Until next time!
Cheers, Andy
© Andy Colley 2015
RELATED POSTS
 Setting up a Dry Toilet System - Facts and Figures
What is interesting about this bill is that the actual water used
has gone from 45 cubic metres to 13 cubic metres, so the water consumed
now costs us over two thirds less than before... read more
 A great way to process dry toilet liquid for around 6 Euros or 5 Dollars worth of materials. .. read more
 Composting Urine Using a Straw Bale. Dry toilets for all climates.
 A great way to process dry toilet liquid for around 6 Euros or 5 Dollars worth of materials. .. read more
Humanure - Two Years of Living with our Dry Toilet
Humanure is like death and taxes it's something we all know about but as the elephant in the room, are most loath to mention it...read moreRETURN TO GREEN LEVER CONTENTS PAGE FOR MORE ARTICLES


