They say "it’s an ill wind that blows nobody any good" and this was certainly true with the gales we experienced last November. The wind brought down a very old ash tree in the hedgerow of our garden.
Three positive things arose from this sad demise; we were furnished with some very good quality usable wood, secondly, by falling onto the roof of our dry toilet cabin it proved the robust design of the structure and finally, it provided me with the raw material for an unusual gift.
It was whilst I was making safe the large branches that were being supported by the toilet roof that I came upon an old branch with a burr (or burl) upon it. I was immediately intrigued by the shape and figuring of this burr that I cut it away from the parent wood and put it to dry in one of the outbuildings.
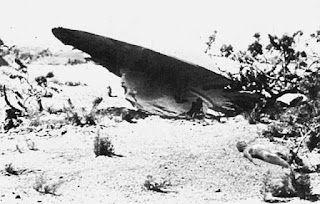
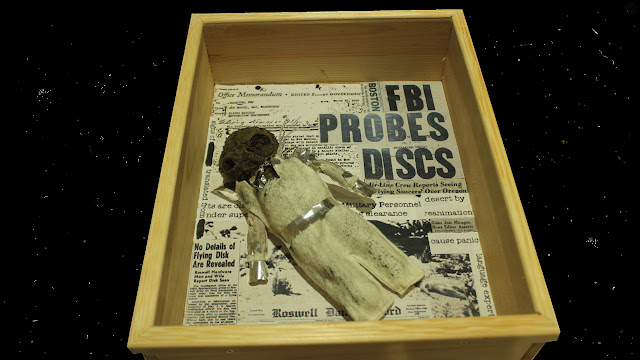
Perhaps it was my fertile imagination but I was reminded of the not-infrequent images of ‘Roswell’–type aliens seen on the ‘net and I decided to use it as part of the gifts we would be taking on our visit to family in Scotland. In fact, they've called it 'the Alien Autopsy Box'.
 Initially, I’d thought of making a box of curiosities – of items found around a UFO crash site, but on reading the published documents on reported alien crash sites Sue came up with the idea of using the burr as the alien head and making a ‘garment’ as described in one of the U.S. Government reports and mounting this, with the head attached, (a ‘Roswell Barbie’?) in a box with Newspaper headlines decorating the back wall.
That being the plan I prepared the burr head by cleaning the dirt from the crevices in the ‘face’ and then flattened the rear of the head using a belt sander.
It was whilst I was making safe the large branches that were being supported by the toilet roof that I came upon an old branch with a burr (or burl) upon it. I was immediately intrigued by the shape and figuring of this burr that I cut it away from the parent wood and put it to dry in one of the outbuildings.
Perhaps it was my fertile imagination but I was reminded of the not-infrequent images of ‘Roswell’–type aliens seen on the ‘net and I decided to use it as part of the gifts we would be taking on our visit to family in Scotland. In fact, they've called it 'the Alien Autopsy Box'.
 Initially, I’d thought of making a box of curiosities – of items found around a UFO crash site, but on reading the published documents on reported alien crash sites Sue came up with the idea of using the burr as the alien head and making a ‘garment’ as described in one of the U.S. Government reports and mounting this, with the head attached, (a ‘Roswell Barbie’?) in a box with Newspaper headlines decorating the back wall.
That being the plan I prepared the burr head by cleaning the dirt from the crevices in the ‘face’ and then flattened the rear of the head using a belt sander.
I wanted the box to be glass-fronted and the walls and rear to be made of recuperated wood where possible. As this was intended to be a wall-mounted box I did not want a ‘heavy’ item but something lighter in both weight and appearance. Thus I ruled out my primary material source that is pallet wood as this is normally about 16mm to 21mm (5/8” to 7/8”) thick. I decided to use some planed pine that had been recuperated from the walls of an orange crate designed to be a point-of-sale display box (as well as the shipping crate for the fruit) in our local organic shop. The wall planks were 10mm (3/8”) thick and this I thought would be perfect for the box. For the rear I chose fruit crate wood that was pine but only about 3mm (1/8”) thick.
The wall planks had radiused edges and these I cut square using the table router (I could have used a plane but I was wanting to try the new table router out, there is a link to this project at the end of this article)
The finished width of the wall planks was 100mm (4”). Once cut to length I joined the wall planks to form the rectangular box using pva wood glue. I also used panel pins, pre-drilling the holes first and then holding it square whilst drying using a frame clamp.
The rear wall provided extra rigidity to the box by being glued and tacked in place.
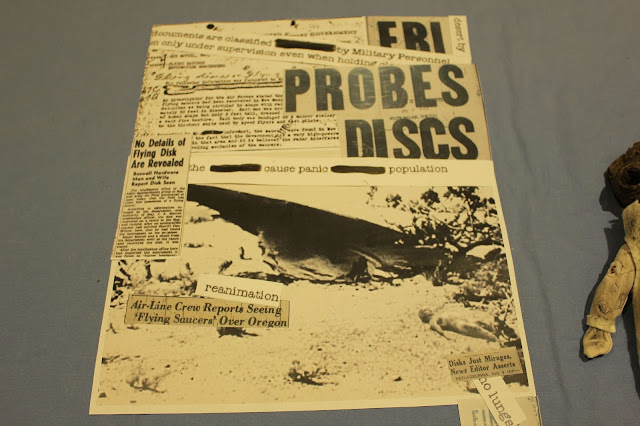
Once the glue was dry and the clamp removed, the copies of the newspaper clippings we had printed off the internet were pasted to the back wall and the ‘alien’ was put into place, secured to the back wall with a screw through the wall into the flattened head.
I’d ordered a piece of picture glass to fit the box. This was cleaned and put over the open front and held in place with the only wood I bought for this job, viz: 18mm x 18mm pine angle moulding. The moulding was cut to length with a 45° mitre so as to form a ‘picture frame’ around the box front. I fixed this in place with 10mm countersunk screws into the side wall of the box.
To finish, I attached a brassed 32mm slotted mirror plate so as to hang the box.
So that was it, a fun way for me to make an unusual gift out of an interesting ‘windfall’.
Talking of fun, we had a great time making the film to accompany this post. Hope you enjoy it!
RELATED PROJECTS
 How to Make a Low Cost Router Table
I have several jobs lined up over the next few months which will involve the use of a router. These include making several wooden doors. Much of the planking I will be using will need to have moulded edges so...read more
Pallet Wood & Old Window Glass for Box Assemblage Art
This like many of our projects is a joint adventure in which Sue and I pool our resources, this time to create an assemblage box for a gift...read more
 DIY Dry Toilet System for 8 Euros $11. Part 2 The Cabin
A practical design if you want to use this design for somewhere such as; your allotment, social garden, a field or even set up a business making them for others.... read more
All the best and thanks for dropping by. Please feel free to share this article, comment and/or ask for further information.
Until next time!
Cheers, Andy
© Andy Colley 2016
RETURN TO GREEN LEVER CONTENTS PAGE FOR MORE ARTICLES


