Showing posts with label home-made tools. Show all posts

Home-made Guillotine from Scrap Metal - Home-made Tools

Fruit crates are in constant supply in our home and we've used a lot of them in our projects, for storage and chicken nests.

Mother and chick asleep in a fruit crateSnoo - zzzzz - e 

However, many of them end up fit only as kindling and it used to be a weekly chore to break them down.


Introduction


We are very fortunate in that our local organic shop gives us all their unsaleable fruit and vegetables for our poultry. This means that we bring home on average about 8 – 10 fruit crates a week containing produce. What the birds are unable to eat goes into our compost bins so the only thing left over at the end of the week are the empty fruit crates. Those which can not be repurposed, as above, are great for lighting fires but can be difficult to break down. 


Orange boxes or fruit crates

Usually I cut through the staples holding the bottom in place and can then stand on the remaining portion so as to beak the sides away from the corner posts. The problem is, I still need to break the side pieces further so as to fit in our cooker and this I used to do using a chopper at the mid-point or by folding the wood strips using my knee as the fulcrum. The problem is that this is very time-consuming and prone to injury from stray staples piercing working gloves and knees and that is why I came up with the idea of making a hand-powered guillotine similar in design to the paper guillotines used in schools and offices.


How to make a guillotine from scrap metal


Method


I needed a long lever for this device as I was unsure how much effort it was going to take to cut the wooden sides. As I needed to hold the material to be guillotined in place whilst cutting, I estimated the optimum length from the pivot point to the operating handle to be about 80cm (this being the distance from my left hand on the table top to my right hand prescribing an arc around my right shoulder with the arm bent at 90°). My left hand would be near to the blade pivot point where the maximum cutting force would be.


RSJ for home-made guillotine


I had a steel RSJ that was left over from a project about 15 years ago and it was of a suitable size as the base of the guillotine. 


recuperated scrap steel for home-made guillotine


For the blade I recuperated a mild steel strap hinge from some old shutters. This was 50cm long.

I also recuperated from an old window, some half-round steel bar used as part of its locking mechanism.

recuperated steel for home-made guillotine


To make the blade I first cleaned off all the paint from the hinge.


welding haf-round bar for home-made guillotine
I then welded the half-round bar to the top long edge of it ensuring that about 20cm extended beyond the end of the hinge so as to function as the handle.

work in progress homemade guillotine


I welded another length of half-round bar to this so as to produce a nearly round handle. I then used a hand-held grinder to dress the welds and to grind a cutting edge on the blade. I ground this edge to a fairly obtuse angle of about 85° .

work in progress DIY guillotine


I drilled a13mm hole for the pivot at the end of the blade.


The RSJ I was to use for the base was 94cm long and was to function with the web of the beam being horizontal and thus the hole for the pivot was drilled in the flange at a distance of 49cm from the beam end. 


tree stump anchor for home-made guillotine


The remaining 45cm of the beam was to rest across the upper face of a tree-stump I recuperated from the beach about 20 years ago.


work in progress home-made guillotine


This would be anchored to the stump using a chain loop. Thus the cutting portion of the guillotine hung over the nearside of the stump so as to enable the fruit crates to slide into position near to the pivot point without obstruction.


Prior to attaching the blade to the base I ground the rounded edge of the RSJ’s flange, from the pivot point, flat so as to furnish the second cutting edge against which the blade would cut.


work in progress home-made guillotine

Once I had tested the efficacy of the guillotine, I finished the device off by attaching a wooden handle over the ‘round’ bar  extending from the top of the blade and fitting a ‘stop’ so as to prevent the blade from passing beyond the RSJ and I also cut off the end of the hinge .


testing the cutting ability home-made guillotine

'stop' for home-made guillotine
adding wooden handle to home-made guillotine


Fitting a ‘stop’  
and 
a wooden handle


Does it work?


The effort to cut the crates up is minimal as long as the blade is kept close against the flange edge of the RSJ (functioning like scissors).. The mass of the blade contributes greatly to its cutting ability as the momentum it has in the cutting stroke helps it to cut through the wood. 

Occasionally I have found that the base needs to be more securely attached so it does not rotate due to the sideways force exerted in maintaining the cutting action of the blade against the flange edge.

Further uses


angle of blade - home-made guillotine

I have subsequently used this guillotine to chop straw for a project currently under way. All I needed to do was change the angle of the blade by just grinding it to a more acute angle. Below is an excerpt from the film, which is included in this blog under the project Home-made storage heater.


Now, if you'd like to sit back and watch the film:


Thanks for dropping by and please feel free to share this article, comment, ask questions and if you'd like to be assured of getting the next post, then sign up to follow this blog.

All the best, Andy

© Andy Colley 2014

RETURN TO GREEN LEVER CONTENTS PAGE FOR MORE ARTICLES  

Home-made Tools - Hand-powered Sander - Precision Picture Frames

There is a preamble to this blog post which discusses the use of bicycles as upcycling material - a link to it can be found at the bottom of this article. It will also take you to a copy of the film: Home-made Tools - Hand-powered Sander.

Architectural drawings from The Builder 1884

 A whole pile of architectural drawings, patiently awaiting frames


Introduction


From time to time I need to cut mitred corners for picture frames. This is something I find impossible to do free hand - if I'm following my 45° line I invariably do not keep the saw cut square to the upper face of the wood. I have a mitre block to aid me in this operation but I never seem to obtain beautifully butting joints. I've seen mitre saws for sale but I dissuade myself from purchasing one as I keep thinking of how little I'd use it. So, when I found myself with the task of making frames, I thought about rough cutting the corner and then achieving the final satisfactory joint by sanding the face to the prescribed finished angle. I knew of powered disc sanders which could tidy up my cutting but I wanted something that would: 1) be difficult for me to 'over do' the sanding operation, 2) be accurate and 3) be cheap.

This led me to think:-
The Final Design
1) a hand-powered machine with 

2) a support table at 90° to the vertical face of the sanding disc and guides attached to this table at the mitre angle of 45° and 

3) to make it myself out of recuperated materials.


Design


Hand-sander prototype
My first idea was to mount a disc, with the sheet of abrasive glued to it, to a wheel spindle from a bicycle front wheel. The hub in which the spindle ran was to be fixed to a support. Attaching a crank-handle to the free end of the spindle would enable it to be turned by hand.

The first idea worked up to a point but highlighted a crucial error, it was impossible to mount the sanding disc to the shaft such that there was no wobble (I call it nutation in the film but that is not correct). This was a consequence of attaching a 230mm diameter disc to the hub face of about 40mm diameter.

Developing the design further I decided on using a more robust arrangement for supporting the disc, that is, using the crank assembly of a bicycle and attaching the sanding disc to the face of the pedal crank.

Most of my projects involve the use of untreated pallet wood. Sometimes on my pallet collecting 'runs' I find a pallet with a chipboard top. Now, I do not like this material because of the toxic bonding agents used in its fabrication, nevertheless, being manmade it normally has the property of being flat and the surfaces are relatively smooth. So, provided that the pallet has not been exposed to rain, or excessive loading, a chipboard pallet-top can be used for making the sanding discs.

Fabrication


Bicycle bottom bracket, chain wheel and cranks

Bicycle bottom bracket
Ready for deburring
The first thing I did was cut the mechanism (with the pedals still attached) and the lower part of the frame away from the rest of the bicycle. The two horizontal arms that go to support the rear wheel I kept with the mechanism so as to furnish a means of attachment to the sander support. These two arms are at 90
° to the vertical face of the chain wheel. The larger diameter downtubes of the frame were cut close to the bottom bracket. After cutting, all the exposed edges were deburred.

The crank levers connecting the pedals to the spindle were then cut, Iusing a grinding disc. 

Bicycle crank wheel
Crank wheel with crank removed
The lever on the crank wheel side was cut close to the cotter pin, the other was cut longer, as this was to be where the turning handle was to be attached. As I had decided to mount the sander mechanism onto a small wooden pallet, the handle length had to be shorter than the height of the pallet top from its base.


Bicycle pedal crank
From pedal to handle


At the free end of the shortened lever I attached a wooden handle to enable the crank to be turned by hand.


The mechanism was then screwed to a small wooden pallet, ensuring that the turning handle was not obstructed. Onto this pallet I also attached a worktop of chipboard with a plastic surface (again recuperated from a pallet). 

I had to have two chipboard discs on this sander. The chipboard sheet from which these discs were cut was checked for flatness by using the flat edge of a try-square, although the edge of a steel rule would work as well. 

Once cut from the sheet, both discs' edges were 'cleaned-up' using a router. 


I have received a few comments on the film regarding my use of power tools to produce a hand-powered machine. I do this because filming a project as it progresses, takes at least 4 times longer than if I was just making it and the power tools allow me to finish the projects in my own lifetime. Nevertheless, most of my projects can be undertaken solely with the use of hand tools. As a case in point instead of machine cutting a circular disc, it is possible to cut an octagon using a hand saw and having the same diameter, this would work just as well. As our plans for the future are to be completely off the grid, I intend to reduce the use of power tools but whilst I still have mains power I shall continue to use them.
 
The disc which was to be attached to the face of the crank wheel had a clearance hole cut in its centre to fit over the portion of the crank lever that remained. There already existed 3 holes in the crank wheel that I believed would be suitable for the mounting screws but, finally I drilled three more holes on the perimeter of the crank wheel to ensure the disc ran 'true'.  


The second disc was fixed to the 'crank wheel disc' with 3 screws. Prior to the second disc being fitted I used a PVA glue to adhere a sheet of sandpaper to its outer face. The size of the sandpaper sheet set the maximum diameter for the disc  i.e. 230mm. 


Depending on the thickness of the chipboard it may be necessary to provide a clearance for any portion of the crank lever that protrudes above the outside face of the crank wheel disc. In my case it merely meant cutting a 5mm-deep recess in the centre of the discs' rear-facing surface.


I attached two guides on the worktop set at an angle of 45° to the sanding disc face. 


Hand-powered sander


Two guides were necessary so that the mitre face at each end of the frame piece could be sanded by the disc moving downwards. 


Hand sander in action
Thus the sanding disc would rotate clockwise to sand one end and anti-clockwise for the other. If the workpiece were sanded with the disc moving upwards it would 'chatter' and be less precise


Left: Sanding disc rotating anti-clockwise.


Does it work?


The results were completely satisfactory. The finished mitre made a perfect corner for the frame


The film and a run down on bicycle upcycling can be found here


Thanks for dropping by and please feel free to share this article, comment and/or ask questions and if you'd like to be assured of getting the next post, then sign up to follow this blog.

Cheers Andy


© Andy Colley 2014 


Home-made tools from dead bicycles - Hand-powered Sander Part 1

The hand-powered sander, made with the chain wheel and lower frame of an upcycled bicycle.

Home-made tools - Hand-powered sander


Introduction


This blog post and the following one cover one of my most viewed projects to date, currently standing at over 4.75 million views. I must confess to being rather taken aback by this, as the project shared the design and construction of a specific tool, which I made to produce quality mitred corners for picture framing. This is not exactly something I would expect to engender a great deal of interest on Youtube. However, the film has attracted a good proportion of bicycle enthusiasts, some of whom have been 'horrified' and often downright rude, in a wide variety of languages, as to why I have upcycled bike parts to create something they see as .... pointless. I thought therefore, before I published the 'blog proper', I'd just by way of this preamble, explain my choice of materials.  I have already done this on the film to various individuals but I thought setting it out here might avoid further confusion.


Apropos the comments I have received on the film


It has become increasing clear that we live not only in a throw-away society but one in which an ever increasing obsolescence is factored into manufactured goods. This is even more evident, when you live, as we do, in a area which has a shifting population. Tourist towns can push out a great deal of low-end and badly engineered goods, dependent on the fact they will be used for a very short period of the year. On the one occasion when we actually bought and subsequently returned one of these items, we were openly informed of the fact by the vendor. 


Beach and oyster beds North Western France
          After the 14th of July there will be standing room only on this beach!

The village in which Sue and I live is slap bang in the middle of a popular French holiday area. Many of the houses are second homes and the dunes and coastal areas are dotted with static caravan sites and individual holiday cabins. In the summer the population increases by at least 1500%! Many of these visitors come for all the holiday periods but it is the long Summer vacation, which gives them the time to tidy their properties and sort through their possessions. Thus from July to the end of September there is a steady stream of these folks taking car loads of 'rubbish' to the dump. This is in the main, plastic garden furniture (often left outside over the winter), 'cheap' electrical goods with built-in obsolescence, ephemeral, thus suited to one season's use and bicycles. These latter are disposed of, not only because they have ceased to function but often because they are children's bicycles and the children have now outgrown them. They are budget machines made and sold cheaply, again specifically for the use of the temporary vacationing population. These machines are often ridden along the beach or even in the water, are rusty, no longer shiny and pristine, unloved and hence unridable. Some are badly damaged and broken beyond repair. 

Bicycles rescued from the dump
   Victims of neglect left (dumped) by the paper and glass recycling
   containers, now awaiting repair or upcycling.

From time to time you can be lucky and find a really good quality bike that, though damaged and/or already cannibalised for the parts, usually the gearing system, can be repaired and reused. Normally however, the majority of dumped bikes are just good for the individual parts, which can be recycled or rather upcycled into something useful. Before I took the pieces I needed for this project from the bike below, it had already been used to repair another better quality machine and had had some of its metal spokes used to repair a friend's fishing gear. I still have this particular bike's remains and have most of the bits already planned for future projects. To the people who comment on my films about the bike, know this, I would rather it ended up being of use as individual parts rather than finish as a crushed piece of amorphous scrap or worse, chucked into the earth as landfill. 

Low end Peugeot bike
On the left is the bicycle in question, a low-end 'sports' girl's model. The brake levers and brakes have already been used by a neighbour to mend his grand-daughter's bike.

The seat, pedals, handle bars and handle bar grips are of inferior quality. However, the moving components, such as the wheels and crank set are manufactured to a high standard far above that expected from the general appearance of the bike. This is because over decades the manufacturing process has been refined to produce the components to the precision required which defies cheapening  The paradox being that wheels will always run silent and true whether on a low or high end model, in itself a feat of Engineering!

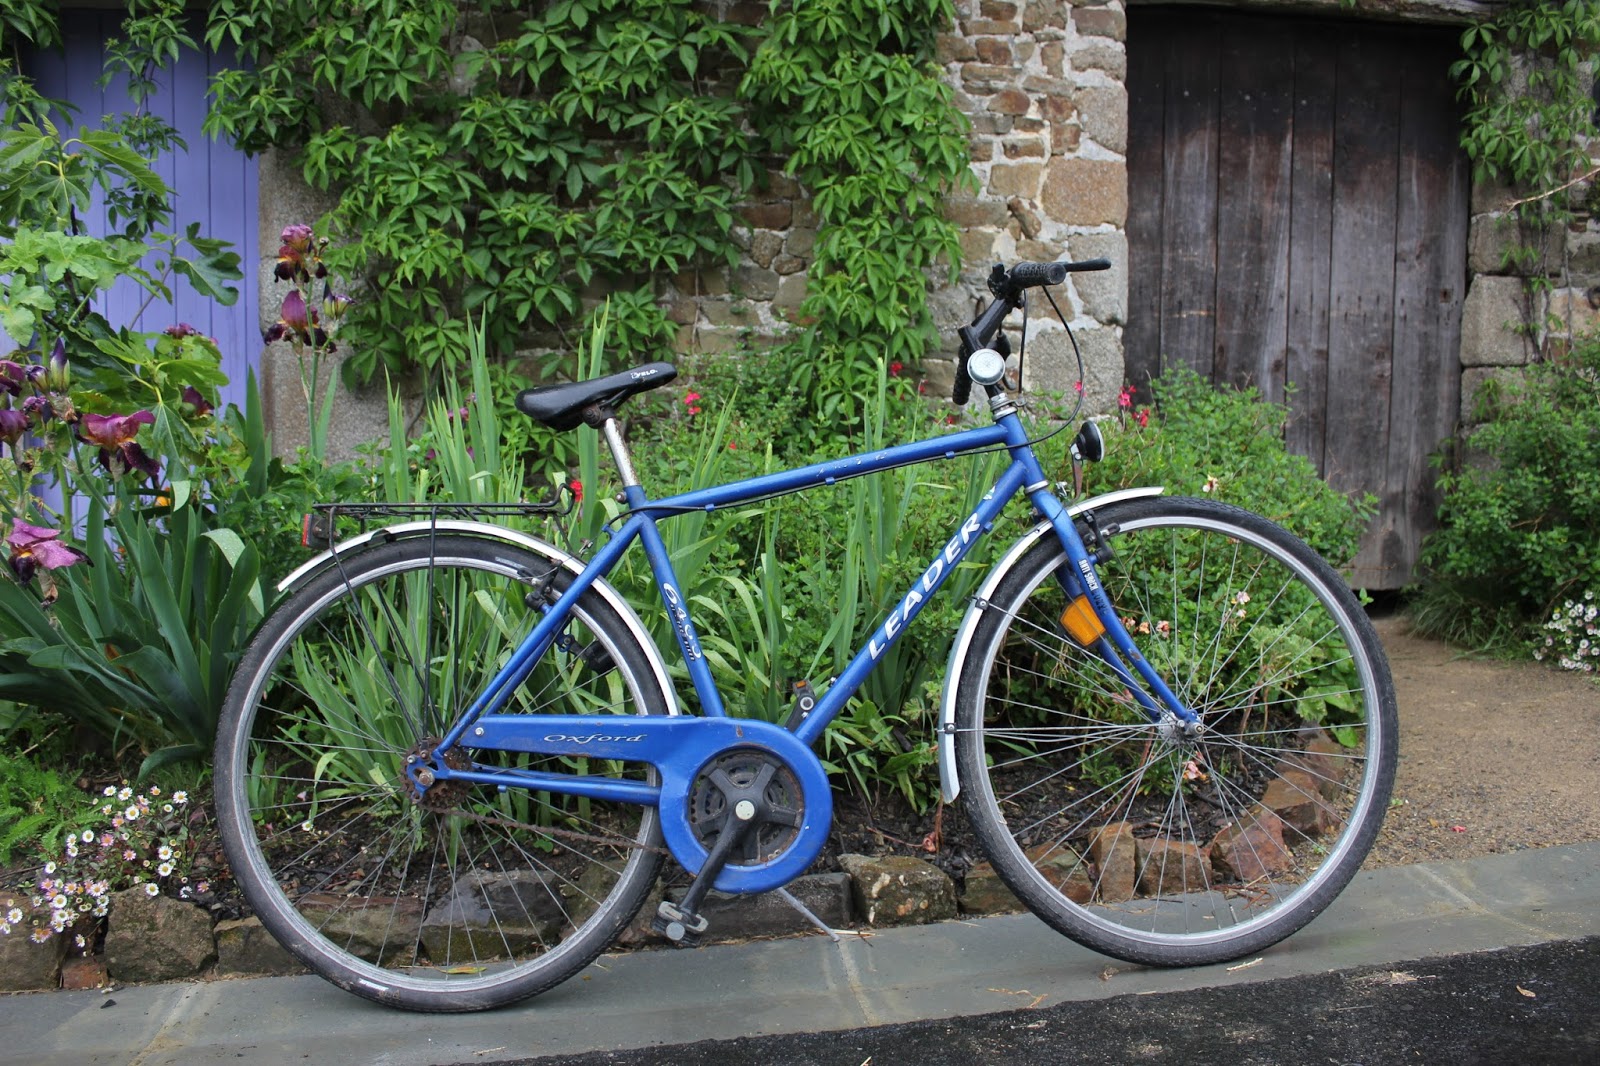
Leader bicycle - Oxford 6400

On the right is the bike Sue spotted as it was about to go in the skip (dumpster), the owner obligingly admitted he had already cannibalised the Shimano gears. However, having just taken it for a spin up and down the lane, I reckon it's a great little machine in its present state for a trip to the shops and back.


Why 'dead' bicycles can be upcycled


The success of this machine as a form of transport lies heavily on its robustness. The moving parts of the bike can function hour after hour with very little maintenance. If you ever get a chance to lift a bike's front wheel off the ground and spin it you can appreciate the smoothness of the wheel's rotation. 

Wheel hub and spindle from a bicycle

I always find this amazing when you look at how small the hub (where the wheel spindle goes through) is, in relation to the rest of the machine. Even more impressive when you also factor in the increase in load that occurs when the rider is upon it. The efficiency with which bicycles are manufactured means that these beautifully smooth-running components are produced to a high standard even in the low-priced machines. Thus the bicycles that fall victim to being outgrown, out of style or discarded through redundancy very rarely are chronically knackered but have materials and components that may still be usable with a little bit of ingenuity. Mostly people just enjoy cycling without giving a thought to the superb engineering design and manufacture which goes into individual parts.

In Conclusion 


I'd like to thank everyone for taking the time to watch this film. I hope the above has explained why I regard the bicycle as such a valuable resource, not just for transport and how, that even at the eleventh hour, it can and should be snatched back from the jaws of the ignominious crushing machine. It might also be of interest for people to know that the retired but often very skilled populations who live by the sea can and do supplement their pensions by repairing dumped goods and selling them on at car boots throughout the Summer season. It is ironic that without the cynicism of built-in obsolescence and the spend-dump-spend holiday spirit of those on vacation, my neighbours would be a little poorer and I still wouldn't be able to get those pristine mitre joints for our picture frames.

Now if you'd like to, sit back and watch the film


To continue to the detailed break-down of this project follow this link

Thanks for dropping by and please feel free to share this article, comment and/or ask questions and if you'd like to be assured of getting the next post, then sign up to follow this blog.

All the best, Andy

© Andy Colley 2014


Home-made tools - How to save time when cutting pallet wood. The Plankmaker's Holdfast.

This is my take on an ancient device used for making rake handles. It's called a Rakemaker's Holdfast and I saw it demonstrated at an ecomuseum a few years ago.


The Rakemaker's Holdfast comprised two wooden pegs secured into a vertical post, the one peg approximately 200mm higher and around 75mm behind the vertical plane of the other. By laying the rake handle on top of the lower peg and underneath the upper peg, the Rakemaker could ensure the stuff was held securely whilst using his drawknife. The more pressure used by the craftsman, the more securely the handle was held. To release the handle from the holdfast and thus progress with shaping, it was simply a matter of releasing the pressure and rotating it.


As I was about to start building a new hen house and had 30 pallet planks I needed to cut lengthwise, I decided that I could use the above concept to speed things along. The most time-consuming part of sawing long planks is in securing them with a G clamp, which must then be released for the plank to be turned and then reclamped. 


All I did was take an old saw horse, I'd made some years ago from scrap wood and add a couple of concrete blocks to stabilise it, otherwise the horse would tip.


I can now 'thread' my plank over the nearer rung of the horse and underneath the further one.


The weight of the plank holds it in place and is further secured by the additional weight of the circular saw. 

Once the first half has been cut, the plank can simply be turned over lengthways to continue the job.


It may not be as fast as using a table saw but it's a darned sight cheaper!

If you don't have a saw horse, you could clamp two flat pieces of timber to the top of a workbench, such that 200mm projects over the edge of the bench top and use this as the Holdfast.

Now if you'd like to, sit back and watch the film. 


Thanks for dropping by and please feel free to share this article, comment, ask questions and if you'd like to be assured of getting the next post, then sign up to follow this blog.

All the best, Andy

© Andy Colley 2014


A Simple Home-made Honing Guide for Plane Irons and Chisels. Part 2 - To the Workshop!

This method is to enable the beginner at sharpening to get a feel for the correct sharpening angle by using a home-made low-cost guide.

Me and my shadow - sharpening chisels and planes 


How to make the guide


I screwed the  MDF board to a piece of timber so that it could stand vertically on its flat edge on my workbench.


I supported the flashlight horizontally between the laths of a fruit crate at the same level as the top face of the sharpening stone.  The 30° line on the board was coincident with the light path from the flashlight. To get a sharp shadow you will need to position the stone about 100mm (4") from the board.


How to use the guide to sharpen tools


When I turned on the flashlight the shadow cast by the stone was clearly visible on the board and the 30° line could be easily seen. 


As I placed the chisel tip onto the stone surface, the shadow cast by it could be seen on the board. I then aligned the shadow with the 30° line.


I could now start honing. By keeping on checking the line of the shadow with the 30° line on the board I ensured that the angle was maintained at each pass of the chisel.


As the honing progressed, it was very simple to change to the finer grit of the diamond-faced sharpening stone. Even changing to an oilstone would not alter the relationship of the chisel angle to the stone face. 


Obviously, you need to ensure that during the honing process the long axis of the tool is square to the face of the stone so as not to produce a sharp edge that slopes across the tool's width. 

 Here's the film: 


Thanks for dropping by and please feel free to share this article, comment, ask questions and if you'd like to be assured of getting the next post, then sign up to follow this blog.

All the best and Happy honing! Andy

© Andy Colley 2014