Showing posts with label Insect Hotel as a utility box cover. Show all posts

An Insect Hotel as a Utility Box Cover. Part 3 - Installing


(The Design & Construction of the Insect Hotel can be found here)

Having made the insect hotel, its roof and metal posts in 'kit' form as it were, it was time to transport it and put it in place. Arriving at our friend’s house a little preparation was required (before operating shave the patient). A quick run around the grass with the mower cleared the area.
 
mowing area prior to installing insect hotel

The bottom portion of the hotel was then lowered over the utility box such that the box was roughly centred within the structure. 

foundations planned for insect hotel

I used the metal posts laid on the grass to indicate the position of the hotel’s corner posts. 

digging foundations for insect hotel

Lifting the hotel clear of the box, I could then dig four holes to accommodate the metal posts.

Luxury insect hotel covering a utility box fixing posts

The non-rebar section of the metal posts were then pushed up the holes drilled in the corner posts of the hotel. Thus, the hotel was supported on these structures. 

Luxury insect hotel covering a utility box cecking levels

The hotel was lowered over the utility box once again, this time ensuring the metal posts were in the holes.

Luxury insect hotel covering a utility box working on foundations

I wanted the bottom perimeter of the hotel to be above the soil so as to prevent rot. To this end, stones were packed beneath the metal posts and at the same time the hotel level.could be adjusted.


Luxury insect house covering a utility box laying foundation

Once the height and levelness of the hotel base was attained, I could fix the posts in position with a mix of concrete. This is a compound I do not like to use, but I felt that I could justify the small quantity required for this job. The alternative I had considered was to excavate and bury a metal ‘ring beam’ with the four metal corner posts pointing upward to support the hotel. Alternatively, The whole assembly could have been fixed to galvanised steel posts hammered into the ground, something I would have done if I’d known where the underground electrical supply cables were running. I felt that the method I was using was the best for the time I had. 


Luxury insect hotel covering a utility box work in progress

Finally, before leaving the concrete to set, I checked both doors of the hotel opened without any binding.

Luxury insect hotel covering a utility box

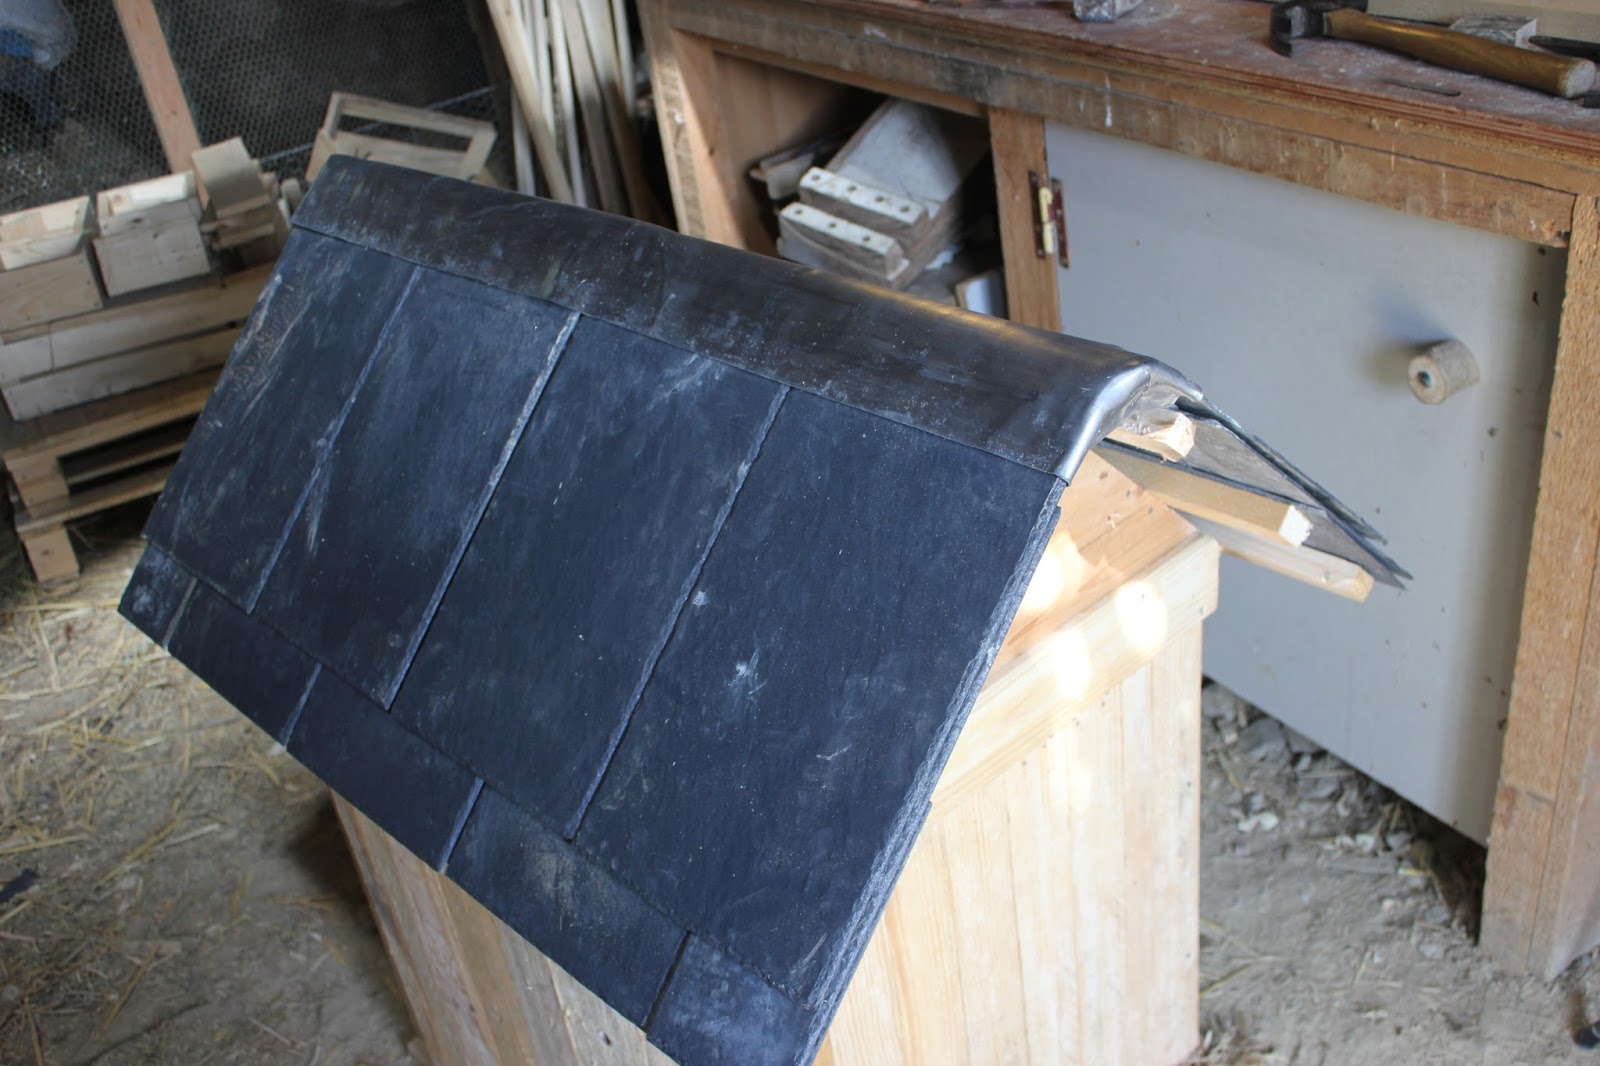
Having put the roof assembly onto the base and rechecking the levels, I then left it for 24 hours. 


Installation of a large insect house

The next morning the, now set, concrete was covered with soil and tamped down. I packed some flatter stones under the wooden edges of the hotel base to give some added support. 


And that was it, one ugly utilitarian box hidden by an elegant and serviceable insect hotel. Funnily enough on the way back from our friend’s property we passed through a small town where five or six  new houses have been built. All the houses are designer-built and each is different in size shape and materials of construction. Every one of these had the same ugly utility box cluster at the front of the property. So if you know someone in a similar position, with a big unsightly pile of plastic in front of their new property or renovation, then please pass this idea on to them and so then more insects can have deluxe accommodation in their own five star insect hotel.

European black bee

Thanks for dropping by and if you have enjoyed this post please share and feel free to comment, ask questions or relate your own experience of the de-uglification of utility boxes.

All the best from sunny Normandie, Andy 

© Andy Colley 2014


An Insect Hotel as a Utility Box Cover. Part 2 - Roof Construction & Furnishing

THE ROOF


The roof was constructed in a similar fashion to that of a house. The pitch was 45°. The gable ends supported the ridge purlins/laths. The slates were nailed to the laths using galvanised clout nails. 


Insect hotel cover for utility box

The gable ends were thus 90° triangles and comprised of pallet planks nailed to principal rafters.


I made an end lapped joint at the top of these rafters so as to furnish a flat face to which the gable end planks could be nailed.


Each gable end rested on the top face of the East and West wall planks, one in line with the South wall and the other the North. 


Work in progress insect house

Pallet planks screwed to the outer face of the North and South walls served as the fixing face for the gable ends.


Once the carpentry was in place, I used a string running from the end of the ridge purlin to the end of the bottom lath as a guide for the lateral position of the slates. 


For the first row of slates I also needed to ensure that they did not protrude into the path of the opening doors. 


To this end I clamped a plank to the underside of the East/West wall planks. This was also the the upper limit for the doors on these elevations. Hence, provided the slate rested on this guide plank I was assured that the door would not be obstructed.


The slates for the first row were cut to half length so as to form the eaves row.
 

I drilled nail holes in all the slates prior to fixing. When fixing slates in the middle of the roof I found it necessary to support the lath behind where I was nailing with a lump hammer, I should have had a rafter in the centre to give a little more stiffness!

 
Prior to the last row of slates being nailed in place, I laid a strip of roofing felt over the ridge and on top of the penultimate row of slates to  ensure the roof was weatherproof


I used lead flashing to cover the slates upper edges at the roof ridge.


Finally, I closed the gaps between the underside of the slate and the principal rafters by cutting and stapling fruit crate wood to the inside face of the rafter.


FINISHINGS & FURNISHINGS 


Wooden catches and handles were made for the doors.


A coat of linseed oil, tinted with four earth pigments, was applied. If you have never used these before, we have an article here


The hotel was furnished with a selection of pallet wood blocks, these had been drilled using a jig I had made for ease of 'mass production' I will link to it when I have made the film on it.


Pallet wood blocks Insect accommodation

We also featured a beautifully figured dead branch from our friend's woodland.

Insect house details

Pine cones from the nearby sea shore and many dead flower/plant stems and stalks, drilled shrub branches, bamboos and dried leaves from our garden.

We also particularly added some length of giant bamboo to accommodate the glorious European black bee.

European black bee

For detailed information on how and what to choose, sizes of holes to drill and tips on length and diameter of individual accommodation for specific arthropods please refer to our Luxury Insect Hotel  design.


netting over luxury insect hotel


A layer of chicken-wire was fixed over the front of the insect house to protect it from birds, who both love to look for nesting materials, try to attach nests and/or eat the insects!


detail from luxury insect house


The wire was neatly held in place with some strips of fruit-crate wood.


For the installation of  this insect hotel and the successful hiding of an eyesore, follow this link.

In the meantime, thanks for dropping by and if you have enjoyed this post please share and feel free to comment, ask questions or relate your own experience of the de-uglification of utility boxes.

All the best from sunny Normandie, Andy 

© Andy Colley 2014


An Insect Hotel as a Utility Box Cover. Part 1 - Design & Construction

A friend of ours is restoring a 300 year-old stone-built longère or long house. The electricity company brought power to the property but sited the ubiquitous supply box right in front of the house. Not surprisingly, she is unhappy with the incongruous nature of such a utilitarian container and asked me to come up with something to disguise the box..
 

Insect hotel for camouflaging an eyesore
It was Sue who came up with the idea of constructing an insect hotel to hide it. She thought that just covering the box with a wooden or stone structure would look incongruous growing out of the front lawn near the flower beds but siting a bug house there would be ideal. I think it is a concept that could be used to encourage insects and camouflage an eyesore, wherever and when ever one may occur.

To give the design a very personal touch, we took an old and very beautiful section of dead tree branch from the property to use in the box. We also collected a variety of cones from the nearby pine forest that skirts the sea shore.

Insect house detail


Design

Apart from the aesthetics, the very practical reason to cover this utility box was because such installations have a propensity to become car 'magnets'. Sited as they often are at the front of houses and unexpectedly mushrooming up from nowhere, they are habitually backed into by drivers. So the design was made imposing enough to be visible and out of any 'blind spot'.

I decided to make the hotel/cover in two parts: the box (including the insect hotel proper) and the roof. Our friend had some roofing slates left over from last year's major works and I thought it appropriate to have a pitched slate roof  protecting the insect hotel. This would then match the house and add to the harmony of the design within its surroundings aka the genius loci. The accommodation for the insects was to be on one side only, that is the southern elevation. Two doors on the western and east elevation would permit access to the electrical boxes when required.


Insect house project

Finally, the whole was to be held in place by using steel anchors at the four corners embedded in concrete. The ‘free’ ends of the anchors were to fit into pre-drilled holes in the corner posts. The use of these anchors had a further advantage, that is the wooden corner-posts could be held clear of the ground without compromising the stabilty of the hotel, thus limiting the contact with damp during the Winter months. Concrete is not normally a material I use but as it was available here, leftover from another job and as I would be using so little, I opted to use it.


Construction

pallet wood posts for insect hotel


After measuring the minimum interior size needed for the enclosure, I first cut the four wooden corner posts from some 35mm thick pallet wood. 

rebar anchors for bug house 


The anchors were made of rebar welded into a cross, the end going into the corner post needed to be round in section so I welded a length of 12mm diameter mild steel bar  to this. They bore an uncanny resemblance to the turn-of-the-century funeral crosses you see on nuns' graves around this area. Albeit a little less ornate.


drilling posts for insect house

In order to ensure the 12mm hole was drilled centrally up the corner post, I used a small drill press and clamped it to the workbench such that the 12mm bit was over the edge of the bench. I positioned the corner post, and clamped it to the workbench leg so that the centre of it was directly beneath the tip of the drill bit. The post had to be aligned with the vertical axis of the drill press. 

Insect hotel - cutting posts to length  


Once all four posts were drilled, they were cut to length.


Insect house in construction
 

For the hotel side of the cover, I made square cut-outs at the ends of the upper and lower pallet wood planks to fit the posts., the vertical side walls were nailed to the posts and also nailed into the end grain of the top and bottom planks.


Insect hotel box section


The stapling of 10mm thick tongue and groove panelling to the rear of the rectangular frame forming the walls of the hotel stiffened the entire structure.
Insect hotel under construction


The north wall was much simpler, with the posts nailed to two horizontal rails and with the wall planks nailed to these. The substantially longer nails were bent over on the inside of the wall and hammered flat.


Bug house North side
Insect house making North sidePrior to the fixing of the wall planks, two additional wooden planks were cut to fit the gap between the rails and were nailed to the posts.
 
  Insect house under construction

Two pallet planks were screwed to the upper faces of the north and south walls so as to form the other two sides of the structure. Narrower planks of the same length were screwed to the lower edges of the walls, thus forming the rectangular faces of the East and West aspect.

 Body of insect hotel box cover completeInsect hotel utility box cover - doors 

Doors were made to fit these faces and were attached.


In the next post, I  continue, with the construction of the roof and the fitting out and finishing of the Insect Hotel the link is here.

Thanks for dropping by and if you have enjoyed this post please share and feel free to comment, ask questions or relate your own experience of the de-uglification of utility boxes.

All the best from sunny Normandie, Andy 

© Andy Colley 2014