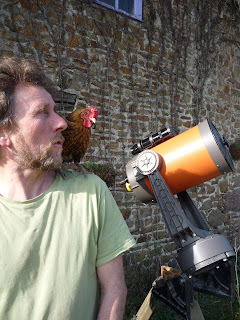
This post illustrates the fabrication of a solar filter to fit a Celestron C8 astronomical telescope. The filter medium used is Baader AstroSolar safety film. As you will gather from the next paragraph, I have been using this filter for several years but only uploaded the project originally in film form, here now is the written version.
The range of PVC tube available means that the filter body can be made to fit any diameter of scope (find a friendly plumber or building contractor for any offcuts).
Preamble - And What if I Don't Have a C8?
The following method of fabrication will apply for any size of telescope and where there may be design differences I have added them in the relevant paragraphs.The range of PVC tube available means that the filter body can be made to fit any diameter of scope (find a friendly plumber or building contractor for any offcuts).
Introduction
I have always been fascinated by the subject of astronomy and regularly observe the night sky. Aids to help my observing are binoculars (for quick sessions) or a Celestron C8 Schmidt Cassegrain telescope. I'd started to think about observing the sun and realised that mounting a filter using AstroSolar film onto the C8 would be a low cost path to do so.
I'd seen various successful attempts at making filters using this film but did not feel that the main material of construction (cardboard) used in these would be as robust as I would have liked. Admittedly, most of these filters were for small refractors (up to 4" or 100mm).
Spurred on by mains drainage work in our village in 2011 I was able to obtain for free the essential component for the filter mount and completed the filter for the forthcoming transit of the Sun by the planet Venus in mid 2012.
Design Specification
The filter housing needed to fit over the front face of the telescope (the corrector plate) and would hold the filter film such that only the sun's rays that passed through the filter would enter the telescope.
The filter housing needed to be securely held in place, preferably locked there, so as to prevent the accidental removal of the filter whilst pointed at the sun.
To prevent possible damage to the filter film when not in use, a means of safe storage would be required for it.
Sourcing materials
As you can see from the photo above, in 2011 every household in our village was connected to mains drainage. When the massive civil works was near to completion, I was able to obtain a short length of new 10", 250mm PVC pipe, the internal diameter of which was a fraction bigger than the C8's diameter at the correcter plate end.
 Now that I had the raw material for the mount I ordered the Baader Planetarium AstroSolar Sun Filter
* Baader AstroSolar film 7.9" x 11.4" is now back in stock as of today 5th August. As is the larger sheet, so maybe a group of solar observers could buy this and divide it between them! Baader Planetarium AstroSolar Safety Film Visual, 50x100cm / 19.7" x 39.4"
Just in case the above sell out again! There is also this product to choose from and it gets good reviews: Thousand Oaks Optical Solar Sheet
For finishing the mount I had some silvered adhesive tape left over from some heating duct work, but this was purely cosmetic and not essential to the function of the mount. However, I see no reason why, for a little extra work, this filter shouldn't be aesthetically pleasing as well as highly practical!
For finishing the mount I had some silvered adhesive tape left over from some heating duct work, but this was purely cosmetic and not essential to the function of the mount. However, I see no reason why, for a little extra work, this filter shouldn't be aesthetically pleasing as well as highly practical!
Construction
Around the correcter plate mounting ring on my C8 are several set screws and I decided to use the heads of these to aid in the secure attachment of the filter. I first cut from the PVC tube a ring about 2" 50mm deep, this was the filter body. Sliding this ring onto the end of the scope I was then able to mark the radial position of each set screw and then cut a slot in the rings lower edge so as to allow the ring to fit over the end of the scope tube with the top face of this ring projecting about 1/2" (12mm) beyond the telescope tube.
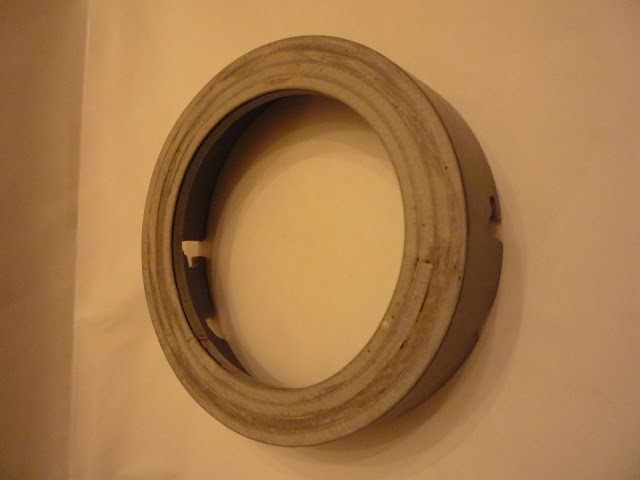
Now comes the clever bit, I noticed that two set screws were nearer to the correcter plate and were diametrically opposite, these are for the attachment of counterweights. The ends of the slots in the PVC tube for these two screws were extended around the ring's circumference so the slots looked like an 'L' shape. Thus, when the ring was placed on the scope the slots passed around the screw heads and by rotating the ring clockwise the screws passed along the lower leg of the 'L' making a more positive means of attaching the filter. Greater security still was furnished by a locking arm made by screwing in a small section of pipe ring at the opening of the uppermost of these two slots such that the section could be rotated across the open end of the slot thus preventing the withdrawal of the filter from the scope. The screw was tightened just enough so that this locking arm would not move too freely.
*If you wish to incorporate the secure attachment and locking method as I have used and your telescope has no screw heads near to the corrector plate or objective lens then I suggest gluing two suitable location pegs near the tube end. Suitable pegs could be made from round set screw heads or round mild steel bar. I would recommend an epoxy adhesive to furnish the bond.*
Now that the filter body was made I needed to provide a flat surface to which the filter film could be adhered. The AstroSolar film is sold in two sizes: A4 sheet and 100cmx50cm. I opted for the A4 sheet which has a size of: 20cmx29.5cm (7.9"x11.4"). Note that A4 paper size is 21cmx29.7cm (8.267"x11.692"). The film was to be attached using double-sided adhesive tape and I decided to reduce the aperture of the filter tube face to a diameter of 18cm (7") so as to ensure the film would be well adhered to the mount i.e. a border of least 1.5cm of film would overlap the filter face.
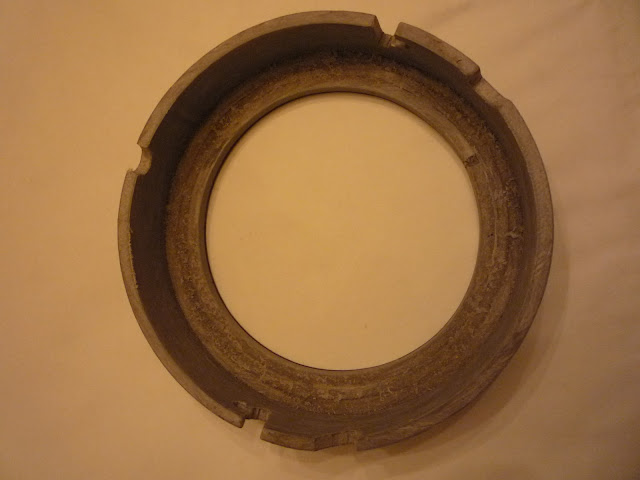
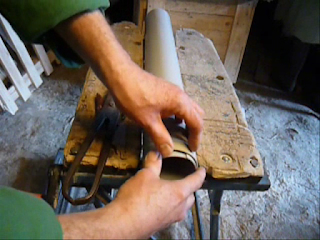
To achieve this reduction and to obtain the flat surface to which to adhere the film required the cutting of 3 approximately 1cm thick rings from the PVC tube. The first ring was cut through in one place on its perimeter so that the ring could be opened (or closed). By introducing it into the inside of the filter tube, i could mark the overlap of the cut ends of the ring which represented the difference in the circumference. I cut this surplus off and checked the fit of the ring inside the tube. Happy with this I then cleaned the inside face of the tube and the outside face of the ring, applied PVC glue to the ring face and glued it to the inside of the tube at the end. Once the glue was dry, I repeated the process twice more, each ring being of a smaller diameter. One of the offcuts from the rings was used to make the locking arm to secure the filter in place. In the photos below, I illustrate the process described above using a smaller diameter; PVC pipe.
 Once fully dry I smoothed off the surplus adhesive and burrs of plastic from the outside end face of the filter tube.
Now came the tricky bit, sticking the film to the end of the filter body. I decided to mount the film into a 'cell' prior to adhering this to the body. I cut two cardboard rings the outside diameter being the diameter of the PVC tube and the inside diameter that of the opening in the filter tube face. I adhered double-sided adhesive to all but one of the ring faces, the latter which was to be the outermost face of the filter was covered with some aluminium repair tape (this was purely for cosmetic reasons).
On a clean table top I placed a clean piece of kitchen towel which I taped to the table surface with masking tape. I then laid the AstroSolar film onto this towel and stuck it at the corners to the towel with masking tape. I did this so as to prevent the film from moving as I brought the cell towards it (effects of static electricity or draughts). I removed the backing paper from the face of the first cardboard ring and slowly lowered it onto the film.
Once in place, the AstroSolar film was unstuck from the paper towel and the cell was turned over so that the second ring could be stuck to the other side of the film, aligning as near as possible with the ring on the other side of the film. Pressing firmly down on the ring ensured that the film was securely sandwiched. Note that there are ripples in the surface of the film, the manufacturers say this is perfectly OK as the film has to be unstressed to perform at its best, trying to make the film 'drum tight' will result in reduced performance. The surplus film from around the cell edge was cut off. Finally the plastic face of the filter tube was wiped to remove any trace of dust and the cell was adhered to the tube.
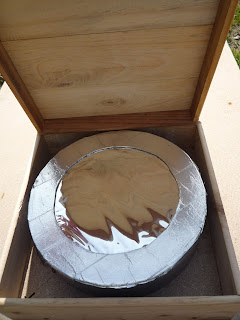
I'd decided to construct a box for the filter because I believed that the surface coatings needed to be protected. The box walls and lid were made out of 12mm (1/2") pallet wood planks and the base was a piece of chipboard. The inside face of the lid was about 12mm above the filter and to ensure the filter did not move in the box I screwed two diametrically-opposed wooden blocks on the bottom which the filter fitted onto, the one block had a screw in the same relative position as the screw on the telescope correcter plate ring which the filter engaged with. The filter could then be put into place in the box and rotated so as to be prevented from moving up and down when being carried. (see film below)
With the filter in place I could align the telescope with the sun by observing the shadow cast by it on the ground, alignment occurring when the shadow cast by the scope was circular.
I still had to use my lowest power (32mm) eyepiece to search about a little before I centred the Sun in the field of view.............and voilà, sunspots!
..and now if you'd like to, sit back and watch the film:
After the first couple of sessions I realised I could make a solar finderscope to make it easier to align the telescope. This cost me nothing to make and I'll describe it in my next post.
All the best and thanks for dropping by. Please feel free to share this article, comment and/or ask for further information.
Until next time!
Cheers, Andy
© Andy Colley 2017
It was whilst I was making the solar filter for my telescope that I seriously started to think about how I was to find the object of study in the eyepiece....read more
 Once fully dry I smoothed off the surplus adhesive and burrs of plastic from the outside end face of the filter tube.
Now came the tricky bit, sticking the film to the end of the filter body. I decided to mount the film into a 'cell' prior to adhering this to the body. I cut two cardboard rings the outside diameter being the diameter of the PVC tube and the inside diameter that of the opening in the filter tube face. I adhered double-sided adhesive to all but one of the ring faces, the latter which was to be the outermost face of the filter was covered with some aluminium repair tape (this was purely for cosmetic reasons).
On a clean table top I placed a clean piece of kitchen towel which I taped to the table surface with masking tape. I then laid the AstroSolar film onto this towel and stuck it at the corners to the towel with masking tape. I did this so as to prevent the film from moving as I brought the cell towards it (effects of static electricity or draughts). I removed the backing paper from the face of the first cardboard ring and slowly lowered it onto the film.
Once in place, the AstroSolar film was unstuck from the paper towel and the cell was turned over so that the second ring could be stuck to the other side of the film, aligning as near as possible with the ring on the other side of the film. Pressing firmly down on the ring ensured that the film was securely sandwiched. Note that there are ripples in the surface of the film, the manufacturers say this is perfectly OK as the film has to be unstressed to perform at its best, trying to make the film 'drum tight' will result in reduced performance. The surplus film from around the cell edge was cut off. Finally the plastic face of the filter tube was wiped to remove any trace of dust and the cell was adhered to the tube.
I'd decided to construct a box for the filter because I believed that the surface coatings needed to be protected. The box walls and lid were made out of 12mm (1/2") pallet wood planks and the base was a piece of chipboard. The inside face of the lid was about 12mm above the filter and to ensure the filter did not move in the box I screwed two diametrically-opposed wooden blocks on the bottom which the filter fitted onto, the one block had a screw in the same relative position as the screw on the telescope correcter plate ring which the filter engaged with. The filter could then be put into place in the box and rotated so as to be prevented from moving up and down when being carried. (see film below)
First Light
Prior to the first trial using the filter, I removed the 6x30 finder scope from the instrument so as to avoid any chance of injury from unfiltered focused sunlight. I do not have any lens caps for this finderscope hence my precaution.With the filter in place I could align the telescope with the sun by observing the shadow cast by it on the ground, alignment occurring when the shadow cast by the scope was circular.
I still had to use my lowest power (32mm) eyepiece to search about a little before I centred the Sun in the field of view.............and voilà, sunspots!
Subsequent Light
Every time I use the filter from that first day I ALWAYS inspect the filter for damage after removing it from its box. This I do by holding the filter at arm's length up to the sun and looking at the sun through it whilst moving the filter. Any pin pricks or other faults would be revealed instantly...and now if you'd like to, sit back and watch the film:
After the first couple of sessions I realised I could make a solar finderscope to make it easier to align the telescope. This cost me nothing to make and I'll describe it in my next post.
All the best and thanks for dropping by. Please feel free to share this article, comment and/or ask for further information.
Until next time!
Cheers, Andy
© Andy Colley 2017
RELATED ARTICLES
How to make a solar finderscope from scrap
It was whilst I was making the solar filter for my telescope that I seriously started to think about how I was to find the object of study in the eyepiece....read more
 Binocular Collimation Quick and Easy Method without Prism Adjustment
I was initially put off from correcting an optical fault in an old pair
of Porro prism binoculars because all I had seen or read online involved
prism adjustment...read more
RETURN TO GREEN LEVER CONTENTS PAGE FOR MORE ARTICLES


