Showing posts with label Converting a broken washing machine to pedal power. Show all posts

Convert Your Washing Machine to Pedal Power Part 5 - making wooden supports for the bicycle

Convert a washing machine to pedal power
I have already mentioned that it was my intention to support the bicycle on wooden supports but I had to reuse the original metal supports due to the forthcoming exhibition. Now that was behind us, I could make the front and rear bicycle supports from recuperated pallet wood.

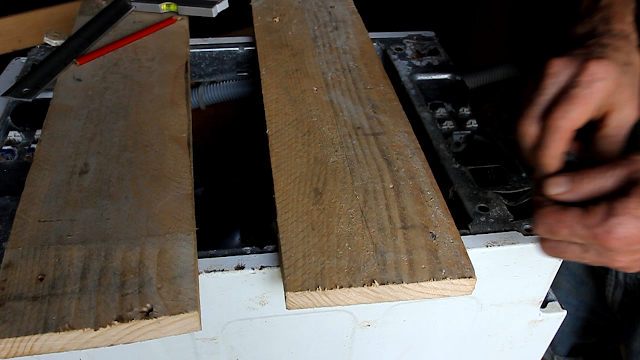
The important dimension was the height of the stand necessary to obtain the clearance between the pedal at its lowest point and the pallet. In my case this was about 12" (300mm). The vertical supports of the stands were stiffened with angled braces which extended to the stand base. Each stand had front and rear 'feet' which were screwed to the pallet and extended across at least 4 of the pallet's planks (this was to distribute the weight of the bicycle and the cyclist).

To give you some sort of idea of the sizes of material used, I list them below:

Stand uprights:   3" x 1" x 12½"  (75mm x 25mm x 310mm)
Base:                3" x 1¾" x 8½" (75mm x 32mm x 210mm)
Feet:               13" x 3½" x ⅝" (325mm x 85mm x 15mm)

These are all recuperated untreated pallet wood.

Bicycle-powered washing machine


The bicycle fork ends were supported on 10mm threaded bar.

For fitting the the supports onto the length of the pallet, I made both of them in the shape of a right-angled triangle.

The rear support comprised the uprights, glued and screwed to the base. The diagonal braces were glued and screwed to the inside faces of the uprights but did not go to the top of the upright so as to permit the fitting of the fork ends onto the supporting bar.

Repurposed washing machine to pedal power


Packing pieces of the same thickness as the uprights were glued to the inside face of the base so that the braces could be screwed to a flat face at the same level as that of the uprights. Once the glue was dry, the stand was glued and screwed to the two 'feet' and the clearance holes for the supporting threaded bar were drilled in the uprights about 1" from the top edge.

Repurpose a washing machine to pedal powerThe front support was a slightly different design in that I needed the fork end nearest the washer to be on the outside face of the support. This was so that the bicycle chain wheel would align with that on the machine. To avoid having to do this asymmetrical arrangement I could have made the chain wheel on the drum shaft stick out further by increasing the thickness of the piece of wood on the shaft. I also made a housed joint for the one upright (see image).

How to convert a washing machine to pedal power


The support was also asymmetrically mounted on the feet to ensure the proximity of the bicycle to the machine. As with the rear support the holes for the threaded bar were drilled 1" from the top edge of the uprights.

DIY conversion human-powered washing machineFitting the bicycle on the pallet

The first step was to ensure that the washing machine was pushed as far as possible on its two fixing bolts in the slotted holes away from the end edge of the pallet so that once the chain was attached, the machine could be moved further from the bicycle's chain wheel so as to increase the chain tension and also to compensate for any minor misalignment.

Pedal-powered laundry solutions


The two supports were placed in their approximate positions on the pallet and the  threaded bars were put in place. The bicycle was lowered onto the bars and fixed in place with nuts. Note that washers and nuts were also on the inside faces of the stands so that they would allow the clamping nuts to be tightened. If these nuts were not there then tightening the outside nuts would  merely squash the forks and the top of the supports together.

Washing machine conversion to human power


Now fixed to the supports, the chain could be fitted between the bicycle and the washing machine and the alignment of the two chain wheels could be checked.

Re-use a broken washing machine

Once it was O.K. the supports were screwed to the pallet. Because the support feet were at the ends of the pallet, the screws fixing the feet went through the top planks and into the pallet's stringer board. On the 'inboard' feet I screwed through the top planks and into a plank similar in size to the support feet.

Converting an old washing machine to pedal power


The machine was ready to go!

The whole project has been made into an omnibus video version with the stands as the last part:


If you read this article and found it interesting then share it with your friends on social media or suchlike. Please also feel free to ask questions and or make comments and if you found this helpful and would like to support this site you can always Buy Me a Coffee at ko-fi.com

You can also find all my films Youtube and also now on Odysee 

Until next time and from a sunny day in Normandie,

Cheers, Andy

© Andy Colley 2019

RELATED ARTICLES

Convert Your Washing Machine to Pedal Power Part 1 - Getting Started (Top-Loader)

The most frequent reasons for machine failure is of an electrical or electronic nature. Neither of these preclude using it, as long as the drum is watertight. Even if you don't already own a broken machine I can guarantee that..read more

How to Convert your Washing Machine to Pedal Power 1 - The Basic Model (Front-Loader)

The electronic fault that arose in our automatic washing machine rendered it useless. I knew that the machine was watertight and...read more

How to Convert your Washing Machine to Pedal Power 2 - Modifications (Front-Loader)

We’ve exhibited this machine on many occasions and the most frequent comment from spectators has been ‘let’s see you spin dry now!’...read more

Make a Pallet Wood Creel or Overhead Drying Rack 

Cheap and cheerful engineering in the practical use of recycled, untreated pallet and fruit crate wood - for drying clothes, herbs, flowers...read more


Convert Your Washing Machine to Pedal Power Part 4 - Setting Up (Top-Loader)

It was now time to mount the machine and the bicycle onto the pallet. I was planning to make new supports for the bicycle out of wood, my idea being not everyone has access to a welder, which was how I'd made the original bike supports. However, it was at this time that we'd been invited to demonstrate the machine at our local organic supermarket as part of a fortnights promotion of their 'autonomous living' campaign.

Pedal-powered washing machine


As time was short I decided to mount the bicycle on the original welded supports that I'd fabricated some years before, for our original pedal washing machine.

I positioned the machine on the pallet with the driven i.e. the chain wheel side nearer the long central axis of the pallet. This pallet was the one that had  supported the previous washing machine and measured 140cm x 80cm. I set the two metal support frames in the approximate position and lowered the bike onto the supports. I had cut a length of threaded bar (10mm - ⅜") to fit each support and the front and rear fork ends of the bicycle were the support points. The fork ends were fixed in place with nuts. Once the chain wheel of the bicycle was aligned with that on the washing machine I could check that the height of the bike above the pallet allowed a clearance for the pedals to rotate and that there was a gap between the pedal and the front panel of the machine to allow the foot to not catch on the panel.

Converting a washing machine to pedal power

Now that I had the relative positions of the two components and confirmed they would fit on the pallet, I could then fix them in place.

Converting your washing machine to pedal power

For the machine I decided to attach two pallet planks to the machine's underside and screw them to the pallet. Turning the machine over I removed the 4 leveling feet from the machine. These screwed into 8mm threaded holes in the corners. I noticed that two of these feet were not square to the machine's base and could see that the corner plates had been twisted. By screwing the feet partway back into the holes it was easy to gently tap the feet back to the vertical. The mounting planks were drilled and mounted onto the machine underside. Note that I had counter bored  clearance holes so that the 8mm bolt heads were recessed.

DIY washing machine conversion to pedal power

Putting the machine back in its place on the pallet I marked and drilled two holes in the plank at the rear of the machine and through the pallets' planks. I'd realised that there was no need to fix the machine with bolts in the other plank (at the front face of the machine) because the forces acting on it from the pedaling action would only try to lift the rear of it up. The two holes in the rear plank were then slotted 2" (50mm) long so that it would be possible to move the machine towards or away from the bicycle, this was so as to give me a means to adjust the chain tension and to correct any alignment error. I used ¼"(6mm) dia. carriage bolts to anchor the machine.

Get fit with a bicycle driven washing machine


It was at this point I realised that being a top-loader the lid of the machine would foul on the bicycle handlebar. Because this lid was in such a shabby state, I removed it and replaced it with a piece of wood that I could slide into place. For the purposes of the coming exhibition, I used a piece of clear rigid plastic so as to afford spectators the pleasure of seeing the drum going around.

The bicycle and its support frames was then put back into place on the pallet.  Prior to screwing the supports to the pallet, I checked the alignment of the two chain wheels (that on the bike and the machine). Simply by looking along the pallet using the face of the machine chain wheel as a guide I could see if the alignment was good. If this step is not undertaken then it is very likely that the chain will not stay in place when cycling. Once satisfied, the supports were screwed to the pallet - there were already holes drilled in the supports' bases from the previous incarnation of the set-up.

I had to extend the bike chain by a few inches to make it fit the layout. Once fitted, I adjusted the chain tension and fixed the washing machine in place.

We were now ready to wash!!!!!!

using pedal power to do your laundry


The first real test of the pedal powered washing machine arose the next day when the whole machine, pallet and bicycle were transported to the organic supermarket for the exhibition. Watch the results in the following video.


Reusing an old washing machineThe link to the next part of the conversion can be found below.

If you read this article and found it interesting then share it with your friends on social media or suchlike. Please also feel free to ask questions and or make comments and if you found this helpful and would like to support this site you can always Buy Me a Coffee at ko-fi.com

You can also find all my films Youtube and also now on Odysee 

Until next time and from a sunny day in Normandie,

Cheers, Andy

© Andy Colley 2019

RELATED ARTICLES


Converting Your Washing Machine to Pedal Power Part 5 - Wooden Supports

The important dimension was the height of the stand necessary to obtain the clearance between the pedal at its lowest point and the pallet. In my case this was...read more


Convert Your Washing Machine to Pedal Power Part 1 - Getting Started (Top-Loader)

The most frequent reasons for machine failure is of an electrical or electronic nature. Neither of these preclude using it, as long as the drum is watertight. Even if you don't already own a broken machine I can....read more

How to Convert your Washing Machine to Pedal Power 1 - The Basic Model (Front-Loader)

The electronic fault that arose in our automatic washing machine rendered it useless. I knew that the machine was watertight and...read more

How to Convert your Washing Machine to Pedal Power 2 - Modifications (Front-Loader)

We’ve exhibited this machine on many occasions and the most frequent comment from spectators has been ‘let’s see you spin dry now!’...read more


Convert Your Washing Machine to Pedal Power Part 3 - Putting it Back Together (Top-Loader)

Now that the machine was stripped of the superfluous bits I could start to get  it ready for bicycle power. If you've just landed on this project then Part One can be found here.

How to make a bicycle-powered washing machine

Reusing the Brackets

Our old pedal-powered front loader had the drum held in place with wooden wedges bracing the drum against the walls of the machine. For this new machine I wanted something more robust. Therefore, the first stage was to modify the old brackets so that they could rigidly attach the drum to the front and rear walls of the machine. In the previous article I showed how I recuperated some very useful steel brackets from the concrete ballast weights. The original holes that were used to secure the weights to the drum could still be used for that purpose. I measured the distance from the drum mounting hole and the rear panel and bent the bracket to a right angle, such that the bent end of the bracket would rest against the wall panel of the machine.

DIY washing machine conversion to pedal power

Securing the Drum

Before I started to drill the 4 fixing holes in the front and rear panels/walls of the machine, I wanted to ensure that the drum which was now supported entirely by four springs was sitting vertically in the machine. By putting the machine on a pallet and packing under the support feet, I could determine with a spirit level that the machine was vertical and thus the drum axis was horizontal and was not twisting on the springs. This meant that once rigidly attached to the supporting walls the forces from the drum would not be anything except the drum's own weight i.e. there would be little or no twisting force which could ultimately distort the wall panels.

Washing machine conversion to pedal power


I secured the first bracket to the lower hole in the drum (there were two upper and two lower holes on each side of the drum to hold the ballast weights) and measured the position for the fixing hole on the wall panel. This position was transferred to the outside face of the panel so that I could drill a pilot hole followed by the bolt clearance hole. Next, I used a marker pen through the clearance hole to mark the face of the bracket. The bracket was then removed from the drum and the hole for the anchoring bolt was drilled in it. The bracket was bolted back onto the drum and the first anchoring bolt was put in and tightened so that already the drum was unable to move. The three other brackets were similarly attached and their mounting holes drilled and secured to the wall panels. It was interesting to note that the machine was feeling rigid once more because the drum was now acting as part of the structure.

Diy biycle powered washing machine

Fitting the Chainwheel Mounting Block

Off the grid washing machine

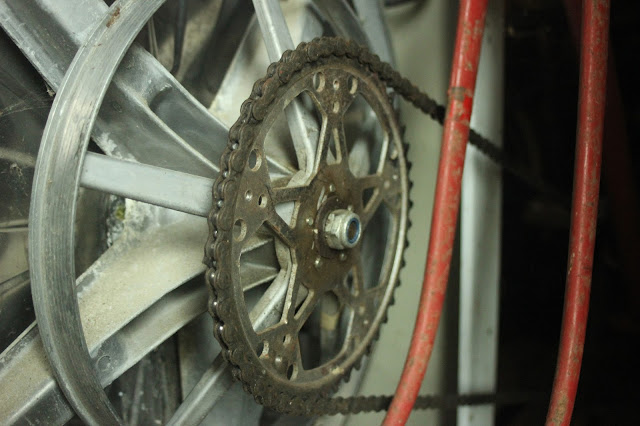
Pedal-powered washing machine The chainwheel which was taken from the first bicycle washing machine was to be attached to the face of the drum shaft pulley. I needed the chainwheel to be offset from the pulley face so that with the sidewall in place the chainwheel would be on the outside of the machine body.

I determined I needed an offset of 1" (25mm) and cut a square from a suitable piece of pallet wood. The block was to be screwed to the pulley and to attach the whole to the drum shaft I needed to drill a clearance hole for the socket that would be used when fitting the chainwheel.

Go green with a bicycle-powered washing machine
When I laid the block onto the pulley I noticed a slight rocking and determined this arose from some casting marks on the pulley face. I remedied this with a flat file. The holes for the screws were drilled in the three pulley wheel spokes. For added security I put two screws in each spoke. The block was held to the pulley face with some strong spring clamps and was then screwed. I kept checking the block position because initially. it did shift a little. Once attached  I decided to cut the block to a rough octagon instead of a square as this would mean a smaller hole would be needed to be cut in the side panel.

Converting a screp washing machine to bicycle power
Re-use a scrap washing machine

Finally, I cut the spokes that extended beyond the block perimeter as the pulley would now be superfluous. In the attached video I highlighted an error in my technique in that I should have kept the pulley in one piece so that I could attach the chainwheel as concentrically as possible by measuring its perimeter to the pulley perimeter. As you will see I did hit upon another solution to this by attaching the block to the axle and by rotating the drum, drew concentric circles on the block face. These circles would aid in fitting the chainwheel as centrally as possible on the block. Once I had aligned the chainwheel to these circles I screwed it to the block. By fixing the assembly to the axle I could check how centrally I'd attached the wheel simply by spinning the drum and looking for any eccentricity.


Chainwheel Assembly to the Machine

Converting your old washing machine to bicycle power

I next cut the hole in the side panel to enable the fitting of the block. I measured the drum axle centre distance from the washing machine frame and transferred this position onto the panel. I scribed a circle centred on this position to the clearance diameter of the block and used a jigsaw with a metal cutting blade to cut the hole.

Washing machine from scrap


Once I'd de-burred the hole edges I refitted the panel to the machine and attached the block to the axle.

Finally, to complete this stage of the project I attached the other side panel to the machine. I was now ready to start assembling the machine and bicycle onto the pallet.

Here's the film of this part of the process:


If you have enjoyed this article and found it interesting then share it with your friends on social media or suchlike. Please also feel free to ask questions and or make comments and if you found this helpful and would like to support this site you can always Buy Me a Coffee at ko-fi.com

Until next time and from a sunny day in Normandie,

Cheers, Andy

© Andy Colley 2019

RELATED ARTICLES

Converting Your Washing Machine to Pedal Power Part 4

It was now time to mount the machine and the bicycle onto the pallet. I was planning to make new supports for the bicycle out of wood, my idea being not everyone has access to a welder, which was how I'd made the original..read more

Convert Your Washing Machine to Pedal Power Part 1 - Getting Started (Top-Loader)

The most frequent reasons for machine failure is of an electrical or electronic nature. Neither of these preclude using it, as long as the drum is watertight. Even if you don't already own a broken machine I can guarantee...read more

 How to Convert your Washing Machine to Pedal Power 1 - The Basic Model (Front-Loader)

The electronic fault that arose in our automatic washing machine rendered it useless. I knew that the machine was watertight and...read more

How to Convert your Washing Machine to Pedal Power 2 - Modifications (Front-Loader)

We’ve exhibited this machine on many occasions and the most frequent comment from spectators has been ‘let’s see you spin dry now!’...read more


How to Convert your Washing Machine to Pedal Power 2 - Modifications (Front-Loader)

If you have just arrived at this project then you might want to to go back to Part One which can be found here, this will give you the steps needed to achieve your basic bicycle washer. The following shows the modifications I made to perfect the machine, making it easier to pedal and also giving us some 'spin cycle' too!

Update - I have recently completed a 'new' pedal-powered washing machine as this one finally sprung a leak after years of great service. The new one is a top loader and also has wooden stands. Due to requests from subscribers, I am writing this project up in step-by-step detail. There are also tips on removing and recuperating materials and complete photographic documentation of each step in the conversion. The first in this series of what will probably comprise 5 articles with their respective films has just been published and is available through the link at the end of this article.

Pedal-powered washer project
 At last year's Art & Garden Expo with our convivial host Daniel Renouf


Apart from the many other advantages of a pedal washing machine - saving on bills and energy consumption, fitness, fun, and time to read... everyone wants to do your laundry. Family, here on vacation, including the children, actually ask us to save up some washing! Even passing holiday-makers stop and ask to have a go pedalling. What could be better than to give them enjoyment and get your laundry done to boot!


Modifications

The first arrangement had a 1:3.3 ratio from the bicycle pedal crank wheel to the gear on the motor shaft and between the motor and the drum pulley  a ratio of 14:1. Thus providing an overall gear ratio of: 4.2:1 i.e. just over 4 rotations of the pedal crank to get 1 revolution of the drum. No wonder 1 felt very little resistance when pedalling..

Pedal-powered washing machine in action
I thought that the gearing ratio should be at least 1:1 that is one revolution of the crank would produce one revolution of the machine drum. To this end, I disconnected the drive belt and screwed to the face of the large pulley wheel a pedal crank wheel from another bicycle. The drive chain was attached to this crank wheel. I had to increase the chain length by about 6-8 links to get it to fit. I had determined this to be the minimum ratio as I believed pedalling/drum speeds of  around 40-50rpm allowed the contents to be sufficiently agitated for effective washing. At this speed, one could feel the load changing as the wet laundry was picked up in the drum by the paddles and then fell back to the bottom of the drum due to gravity. This cadence was very easy to maintain even when the direction of pedalling was reversed. Unlike with the first highly-geared arrangement I had, the load provided a resistance to the pedalling which actually made it easier.

modifications to bicycle powered washing machine

Surplus water removal (spin drying)

We’ve exhibited this machine on many occasions and the most frequent comment from spectators has been ‘let’s see you spin dry now!’. Modern washing machines have very high spin speeds (in the region of 1200 rpm or even greater). The need for these increasingly higher speeds is questionable as the additional amount of water extracted is relatively small. (See end of article for links to 'The Great Spin Debate'). Reading through it, it seems that so much, if not all, of the escalating speeds are nothing more than sales gimmicks and may result in damage to the laundry.

Bicycle-powered washing machine at expo

Nevertheless, being able to remove some water prior to removal from the machine was desirable so I started by calculating what kind of drum speeds were necessary to keep the contents held against the drum wall for the complete cycle i.e. drum speed needed to overcome the acceleration due to gravity. Obviously this rotational speed varies with drum diameter and I've included at the end of this article a link to determine G forces.

With sufficient force holding the garments to the drum walls the water can escape through the holes in the drum. Higher rotational speed will obviously increase the rate of water loss.

pedal-powered washing machine
For our drum of 46cm diameter, a calculated speed of 62.3 rpm would mean the contents would experience a force of 1g. Fast pedalling I could achieve a consistent speed of 100rpm producing a force of 2.6g but, if I dismounted and turned the pedal by hand I could achieve 170rpm producing a force of; 7.4g. Such an action produced a significant increase in the flow of water leaving the drum but it was not possible to maintain this speed for more than 60 seconds or so. On removing the garments there was still a considerable amount of water in each item which could be extracted by wringing by hand.

A Word About Tools

All the work involved in this conversion can be achieved with hand tools but it might be a good idea to invest in at least one power tool just to save time and effort. I work on the premise that tools are a great investment and that if you are going to consider DIY then they are essential. Similarly Safety Equipment is also a necessity, in particular when handling heavy objects and using power tools. Buying these items has an initial outlay but if you buy wisely these will last you for years of projects, for example my current electric drill is well over ten years old.

Electric Drill - Two of my favourite makes are Makita and Black & Decker
Set of Bits for the Above
Wood Saw
Set of Spanners
Range of Screwdrivers
Pliers, Drift or Chain Splitting Tool
Hammer
Centre Punch
Tape Measure
Safety Gloves, Boots and Glasses
Metal File
Tri Square
Additional if Possible:
Jigsaw with blades for sheet metal

Wood Screws, Nuts, Bolts, Washers and Wood Glue


Further modifications and improvements:

Pump removal

After using the machine in this arrangement for 18 months or so I found a leak had developed in one of the flexible hoses connected to the pump. The end result was I found it easier to remove the hoses from the pump cut out the perished part of the tube and re-connect them via some rigid pvc pipe, bypassing the pump completely.

Converting a washing machine to pedal power Spin drying and the future of our laundry needs


Without a doubt removing excess water at the end of the process is the most significant improvement to make. To this end I have obtained from my local dump another non-electronically-functioning washing machine. I propose to set this up as the bicycle-powered washing machine and to convert the existing machine to a more efficient spin-drier by altering  the gear ratio.

When setting up this next machine I will endeavour to fix the drum more securely to the machine frame. This, I now realise, would be an ideal use for the brackets normally supplied by the manufacturers specifically for transporting the washing machine.


Future Projects - Mark 3 Laundry

Next year I intend to design and create a solar water heating system which will link directly to the machine. This will obviate the need for the alternative hot water sources, we use at the moment, viz water heated on our wood cooker and in Summer, by means of a couple of plastic bush-shower bags.

..and now if you'd like to, sit back and watch the film


Have washing machine, will travel! If you read this article and found it interesting then share it with your friends on social media or suchlike.

 Please also feel free to ask questions and or make comments and if you found this helpful and would like to support this site you can always Buy Me a Coffee at ko-fi.com
You can also find all my films Youtube and also now on Odysee 

Until next time and from a sunny day in Normandie,


Cheers, Andy

© Andy Colley 2015

RELATED POSTS

Convert Your Washing Machine to Pedal Power - Detailed Instructions (Top-Loader)

The most frequent reasons for machine failure is of an electrical or electronic nature. Neither of these preclude using it, as long as the drum is watertight. Even if you don't already own a broken machine I can guarantee that one of your neighbours, friends.....read more

Make a Pallet Wood Creel or Overhead Drying Rack 

Cheap and cheerful engineering in the practical use of recycled, untreated pallet and fruit crate wood - for drying clothes, herbs, flowers...read more


USEFUL LIVE LINKS


The Great Spin Speed Debate

G Force RPM Calculator

RETURN TO GREEN LEVER CONTENTS PAGE FOR MORE ARTICLES