The fine weather is here and we want to spend as much leisure time in the garden as possible. Much as we love our poultry we do draw the line with sharing our meals with them. It wouldn’t be so bad if they stayed on the ground but no, from six-week old chicks up they have the ability to fly and do, always onto the table or worse onto our plates of food.. This hampers our enjoyment of mealtimes and it is fruitless trying to explain to them that: we don’t steal from their food bowls therefore……….
One of this year's hatch and a potential uninvited dinner guest!
To this end we decided to construct a gazebo from home-made pallet wood trellis panels in front of one of our greenhouses, the gable-end wall of the greenhouse acting as one wall of the gazebo. The additional usage for this gazebo is that when not in use by us it could form an addition flight and foraging area for our quail, who live in the greenhouse.
Construction and Design Part 1
Posts
I had decided that the trellis panels were to be supported by wooden posts which were attached to galvanised metal stakes driven into the ground. These stakes are not expensive and not only give a secure method of holding the posts but also are a neat way to keep the post-ends from rotting as it is the stake and not the posts that are in the ground. I have found that the wooden posts cost at least 1½ - 2 times that of the stake and also are treated with chemicals, thus I decided to make my own.
The planks I used came from non-standard sized pallets (approx. 2m long), the best place for these seems to be bathroom supplies and joiners, also if you have them in your area, exhibition stand suppliers, who tend to use extra large 'bespoke' pallets.
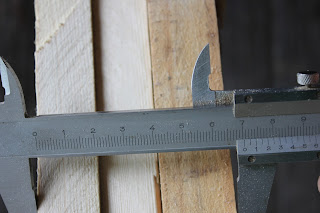
These I sawed to width, 2 planks cut to 69mm width and two cut to: two plank thicknesses subtracted from 69mm.
The four pieces that result were then nailed together, to form a square-section post that fitted into the stake.
Bolt holes were drilled through the 69mm plank faces, using the holes in the stake as the guide. Once drilled, each stake and post were numbered so I knew the holes in the post aligned with the matching holes in the stake.
I cut 100mm (4”) squares from pallet wood to act as caps to the top of each post end.
Framework
Before we made the trellis it was necessary to get the framework in place. This was of particular importance in our planning as we wanted to have a herringbone pattern to our trellis and we needed to make sure of all the measurements so the pattern would work to its best advantage.
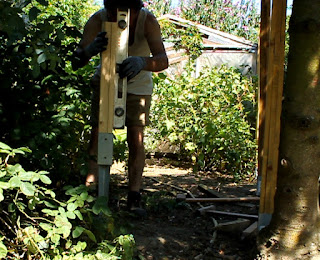
The stakes were then driven into the ground at the determined positions, ensuring that the posts would be vertical once in place. I used 50mm wide battens to connect to the top of each post and two planks at the bottom of each post so that there was a 150mm – 200mm (6” – 8”) deep gravel board barrier from ground level running around the perimeter traced out by the posts.
I put an additional post on one side of the perimeter which was to support an entrance door. The door fitting between it and the corner post. A top 50mm (2”) rail joined these two posts.
All this framework was treated with linseed oil tinted with natural pigment, for more details on using natural wood stains see the link below.
Now, if you'd like to sit back and watch the film. As you will see I did the cutting of the long planks before I made my Plankmaker's holdfast, so I'm including below a link to that project too, which makes for much easier sawing.
All the best and thanks for dropping by. Please feel free to share this article, comment and/or ask for further information.
Cheers, Andy
RELATED POSTS
 Pallet Wood Garden Gazebo Part 2 - Trellis and Door
The perimeter of the garden gazebo now being complete, the next stage was to make it chicken proof, starting with the door...read more
USING NATURAL PIGMENTS
PLANKMAKER'S HOLDFAST
HOW TO DISMANTLE PALLETS - THREE WAYS


where do i get these bottom metal post brackets?
ReplyDeleteHi Gregg, Sorry for taking so long to reply, I somehow missed seeing your comment. I bought these metal stakes at my local builders merchants but they are also available at the big DIY franchises here in the Kingfisher Group, so in France that is Castorama and Brico Dépôt and in the UK - B&Q. This Group mainly covers Europe and Asia but I have looked for the same items in the US and found some on ebay, they are listed as 'Wood Fence Post Spike Anchor 12-Gauge Black Powder Coated'. Hope this is of use and sorry again for they delay, Andy
DeleteI'd also like to know where you found the metal stakes?
ReplyDeleteHi Crissy, Sorry for taking so long to reply, I often don't get advised of comments, so it's only when taking inventory of the blog that I finally found yours. It really seems to depend as to where you live as to how easy it is to find these metal stakes. In France they sell them at my local builders merchants but they are also available at the big DIY franchises here in Europe and Asia, such as the Kingfisher Group's; Castorama, Brico Dépôt, B&Q. Checking today I found the same type of stakes on ebay.com, they are listed as 'Wood Fence Post Spike Anchor 12-Gauge Black Powder Coated'. Hope this is of use and sorry again for they delay, Andy
Delete