Showing posts with label organic gardening. Show all posts

Home-made Repurposed Wood, Luxury Insect Hotel or Five Star Bug House for the Discerning Arthropod

Fun to make and fascinating to watch, these insect hotels can make all the difference to the successful pollination of your fruit and vegetables and also to the control of pests by insect predators.

Luxuty do it yourself insect hotel

Open for Business - Build Your Own Green Hotel

Here's our deluxe version and in the next post I will be featuring our designs for 'Eco Lodges' smaller hanging and nestling accommodation you can place around the garden or orchard. They also make great presents, not only for Christmas but also in this larger form an ideal Wedding Gift. 


Insect hotel filling up
Here is a close up of what an occupied room looks like - in this case the 'door' is closed with clay but some creatures like the leaf cutter bee.. yes it's all in the name! 

Larger arthropods we find in our garden and have photographed, can overwinter in the larger stems and or bark and leaf infill. 
 

Stag Beetle


Some of these like the larvae of the Stag Beetle are becoming ever more rare, so providing them with a permanent shelter is a great idea. The larger stems will also be able to accommodate the beautiful large European Black solitary bee, again another species, who is threatened by extinction.
European Black Bee Insect Hotel

This is a great project to do with kids as there is a massive selection of differing natural materials to be sought from within the garden or further afield in woods and hedgerows. The end result can be quite artistic the only limit is your imagination. Children also enjoy seeing who is using the Hotel and can observe the essential role insects play in nature, for pollination and pest control.

materials to make a luxury insect house


Some of the materials we found for the Hotel, dried teazle heads, fir cones, dry branches, various dry flower and vegetable stems, dry bamboo canes and leaves, moss and lichens and of course pallet blocks.


Making the Hotel Frame


The structure is a rectangular frame with shelves within surmounted with a triangular apex. It is simply nailed together, including the rear wall of tongue and groove planking, which ensures that the hotel remains square and rigid.


I selected 100mm (4") wide untreated pallet wood planks.

The bottom, top and shelves were cut 50cm long. The two vertical sides were cut  50 cm plus twice the plank thickness.


The vertical sides are nailed into the end-grain of the top and bottom pieces and to ensure that the nails do not split the wood this close to the edge, I drilled pilot holes for them.


I used a 2mm drill for the holes, the nails are 2.4mm in diameter.


When nailing the sides I made sure that the rear edges of the planks were level with each other.......


.......and the corners remain square.


I used pallet blocks (pre-drilled for use in the Hotel in this image) to set the distance between each shelf. I found it easier to drive the nails into the end grain of the shelf if I once again drilled pilot holes at the appropriate positions in the vertical side walls.


If you want to put a vertical divider in an area then cut it to length and nail it to the shelf before the shelf is nailed in place. the free end of this divider may then be nailed to the top plank. You can see this in the image at the start of this post.


The triangular section at the top of the structure has a 90° angle at its apex. I initially had cut a 45° angle where it met the edge of the vertical side but I thought this was unnecessarily difficult so I just cut a square edge as illustrated. I found there was no structural difference in doing this and as the wire mesh on the front face was held in place with quarter-round beading this joint was hidden from view.


I had marked a centre line in the top of the rectangle and used a try-square from this line to determine the lengths for the two angled pieces.


Once again, pilot holes for the nails were drilled. Notice that the drill is vertical to the face of the sloping piece of wood.


When the Hotel is filled with the 'bedding materials', the exposed portions of nails are hidden from view.


The rear wall can now be cut to size and nailed in place. I used tongue & groove panelling 10mm thick. I marked the length and shape of the piece and nailed each one in place before marking and cutting the next one. Pilot holes were drilled and the back wall was nailed to each shelf as well as the rectangular frame and the triangular top.


This, ensured the whole structure was rigid and the, potentially, weak points (where nails were entering the end grain or going in at an angle) were reinforced.


And this is how it looks.


Fitting out your hotel rooms


Now comes the fun bit, filling the Hotel with suitable nesting materials. I used the pallet block as a guide for cutting twigs and branches to length. The 'compartments' between the pallet blocks were filled with an assortment of natural materials as well as these cut stems. 


I cleared the pith out of some stems (like the elderberry) with a stiff piece of wire. Some stems were left with the pith as certain insects eat the pith and/or use it to create doors to seal the rooms.


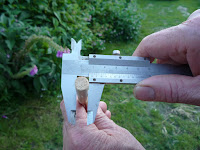
For the twigs, branches, and pallet blocks I drilled holes of between 4mm and 10mm diameter. 

Before everything was put in place, straw was packed along the whole back wall of the hotel to provide insulation and extra bedding.

DIY Luxury Bug House


All of this was done with the Hotel laying flat on its back. 

Once filled, chicken wire was cut to size and secured with quarter round beading nailed to the front edges of the structure. I used 30mm long panel pins to do this.


Make your own Luxury insect hotel


A nail punch was used to drive the panel pins' heads flush with the wood surface.


Siting your Hotel


DIY Luxuty Insect Hotel

Your Hotel once completed should be sited in a sheltered location and preferably in a South Easterly to South Westerly facing direction. This house is meant to be placed at ground level or hung on a wall. In the next blog I will show how to make the smaller Eco Lodges, motels, chalets and gîtes we designed for placing around the garden, on a balcony and/or hanging in trees. 


Beware once made, these insect hotels make addictive watching, people have been known to spend hours observing insects coming in and out of their hotels! Have fun and now, if you'd like to, sit back and watch the film.


For a smaller insect hotel project see our blog post on The Bee Cosy for cosy bees!


Thanks for dropping by and please feel free to share this article, comment, ask questions and if you'd like to be assured of getting the next post, then sign up to follow this blog.

All the best, Andy

© Andy Colley 2014

RELATED ARTICLES 

Home-made Insect Hotel from Repurposed Materials

The Bee Cosy for cosy bees is an elegant green gift for you to make using 99% recuperated materials...read more

Home-made Insect Hotels from Repurposed Materials The Gite & The Chalet

Made from repurposed materials, untreated pallet wood, fruit crate wood and general garden debris. To decorate them, we use natural...read more

An Insect Hotel as a Utility Box Cover - Design & Construction

The electricity company brought power to the property but sited the ubiquitous supply box right in front of the house. Not surprisingly, she is unhappy...read more

An Insect Hotel as a Utility Box Cover - Roofing & Furnishing

The roof was constructed in a similar fashion to that of a house. The pitch was 45°. The gable ends supported the ridge purlins/laths...read more


An Insect Hotel as a Utility Box Cover - Installing

Having made the insect hotel, its roof and metal posts in 'kit' form as it were,it was time to transport it and put it in place...read more

Setting up a Dry Toilet - Stop flushing the Planet's Precious Resources and Your Money down the Sewers. Introduction


Preamble: A Few Facts and Figures 


(in French but bills are bills in any language!)


Before
&
After


 and in financial terms too.....


What is interesting about the above bill is that the actual water used has gone from 45 cubic metres to 13 cubic metres, so the water consumed now costs us over two thirds less than before. The main cost is the standing charge, which is now equivalent to nearly double the price of the water we consume! Even more of a reason, in our new place, to get a borehole dug. A good gauge to tell you when you should be off the grid and consequently off mains water, is when your consumption costs are less than the standing charges or line rental.


Three Great Reasons to Sort out Your Own Manure


Two years ago due to a change in car-parking, we ended up entering our usual visit to the Salon Ille et Bio - Guichen Organic Fair, via the front entrance, Community Hall rather than our usual way through the Community Organic Garden. For the first time we noticed a whiteboard, where visitors could express themselves with some sort of observation or thought for the day. The visitor in front of us took up the marker pen and wrote "Flush toilets are an abomination - they should be banned". Travelling home, an hour's drive, gave us plenty of time to think over and discuss this amongst other great things we had seen at the Fair.

Time was in the essence because an EEC Directive meant that our village was now to be put on mains sewage. The result would mean that like it or not in the following years instead of grey water eventually filtering back into the land, which was fine by us, we use no chemical products whatsoever, all our water would end up in the Sewage Treatment Plant. For the past few years we had had a waterfilled recycled wine bag in the cistern to cut down the volume of water at each flush this but this now seemed insignificant. The water, the urine and the solid mater, were all a useful by-product of us eating and drinking organic food, we decided the time was ripe for us to take control of our own valuable resource. We needed to break away from an insane system, which pours chemicals and energy into water to get it to potable standard only to flush it down the sewers. If we needed a further incentive, then saving money completed the deal. When we got back home we started to draw up plans.
 
My system costs under 10Euros/Dollars, I started with the compost bin, which can also of course be used as the model for a standard compost bin for your garden and household waste. The recommended time for the humanure to be  ready for use is two years but already after three months you will find it has started to rot down. The bin is made of untreated, recycled pallet wood and the only other item you will need to make this work is the sawdust. Trust me it does not smell!. In the following articles I will show you how I set up our dry toilet, the woodwork involved and my system of minimal metal fixings which allows for movement of the planking and minimum costs. There are also updates and an alternative composting system for very cold climates:-

Pallet Wood Compost Bin and Dry Toilet Project Part 1

I opted for a completed bin size of 800mm x 800mm x  800mm, the wood used was recuperated from pallets.The unique design feature... read more


DIY Dry Toilet System for  8 Euros $11. Part 2 The Cabin

A practical design if you want to use this design for somewhere such as; your allotment, social garden, a field or even set up a business making them for others.... read more

DIY Dry Toilet System for  8 Euros $11. Part 3 The Seats


The toilet seat is for the ‘two bucket’ system. One side is for collecting liquid and the other is for solids...read more

DIY Dry Toilet System Part 3 The Seats continued

Continuing the above project with fitting out the interior...read more

Composting Urine Using a Straw Bale. Dry toilets for all climates.

A great way to process dry toilet liquid for around 6 Euros or 5 Dollars worth of materials... read more


Humanure - Two Years of Living with our Dry Toilet

Humanure is like death and taxes it's something we all know about but as the elephant in the room, are most loath to mention it...read more


Thanks for dropping by and please feel free to share this article, comment, ask questions and if you'd like to be assured of getting the next post, then sign up to follow this blog.

All the best, Andy

© Andy Colley 2014


Using Natural Earth and Mineral Pigments in the Home and Garden - A Veritable Feast of Colour

The Alchemy of Artists' Materials - So much more fun than opening a tin of paint


how to use natural ecological pigments


What are natural pigments?

Pigments as opposed to dyes are non-soluble powders which are crushed so finely as to make them usable as paints when mixed with different media such as egg yolks, lime, mortars and oils.They can also be used to create unique colours by addition to various white paints and clear varnishes.  Natural earth pigments, as the name suggests, come from naturally occurring clays and are specific to certain areas, where they have been used for decoration and adornment for many thousands of years. Often roasted to obtain a greater depth of colour they are known under the names of ochre, sienna, and umber and because of their very natural and harmonious palette they can be used to great effect in the decoration of eco interiors and recycling projects. Ochre, which takes its red, golden and brown colour from iron oxide, is thought to be one of the first ever paints used by man. Sienna, a limonite clay, contains ferric oxide, which gives its rich browns and reds. Sienna takes its name from the beautiful hill town of Siena from where it was first extracted. Umber, originally extracted in Umbria, contains iron and manganese oxides, which when roasted becomes burnt umber, the famous deep brown pigment. Other natural pigments I often use are the Ultramarines of the gorgeous purple, violet and blue shades. This mineral pigment, originally made from crushing lapis lazuli, at one time was more highly priced than gold, which is why it was used so sparingly by Renaissance painters. Nowadays this pigment is made by heating mainly kaolin clay, sulphur and charcoal. This brings me to an observation about pigments because you will find their price changes from colour to colour. This is particularly the case for the third group of natural pigments the exotic spinels, which are romantically comprised of crushed gem stones!


How to use and apply pigments


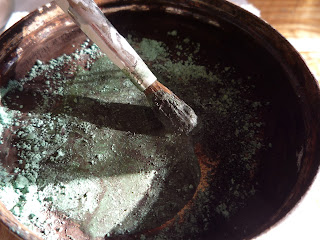
For water-based medium, I first mix my pigment with a little water 

Sharing how to mix earth and mineral pigments

and then add the medium.


For finer work and deeper colour, I would add the pigment directly into a minimum volume of medium. 

Detail from our pallet wood bird bix


When using with a water-based varnish, I would always add a clear coat or coats over the top, in particular where there is heavy usage such as on floor boards. Some companies suggest that the ultramarine pigments are not suitable for exterior use. Our house faces full south and we get salt breezes from the sea and the window frames pictured below were painted some three or four years ago. For me also, I enjoy the fact that pigments may change with time and acquire a patina and sun-bleached look.  With impregnation oils, such as the hemp I used on doors, shutters and the hen houses, I first mix the pigments with a small amount of the oil. The shutters and wooden window frames I tinted some years ago on the North side of the house have not lost any of their colour. When using pigments on boxes, such as Andy's Candle Box Project I used pigment with an Eco water paint and then having decorated the box with découpage, applied a clear varnish. 

Bird box design from pallet and fruit crate wood

Freehold Accommodation and no mortgage payments

Latest project the pallet wood bird box:


Detail of design from the robin box we made: http://thegreenlever.blogspot.fr/2013/02/bird-box-for-blue-tits-chickadees-pied.html


Healthy colour for a myriad of uses 


Finding an alternative builders' merchant or organic shop which sells jars of these wonderful pigments is like being let loose in a candy store because how you use them is only limited by your own imagination. As you will have seen above, you can also now find these on line at Amazon. The Ultramarine blue and lavender I mixed together with an acrylic white and used on all the recycled windows we fitted at the front of the house. One interesting effect of using natural non-toxic materials is that you find that yourself in possession of the modern day Gingerbread House. Until it was fully dried both the putty and the paint were regularly consumed by snails and from the teeth marks, small rodents.

 Natural pigments used on old window frames


Finding a colour which would sit harmoniously with terracotta roof tiles and pink and grey granite is not easy but maybe by their very nature of coming from the same clays, the mixture of these two aquamarines seemed to work. Anyway they did for us, see what you think. 


Using natural pigments to create floor varnishes
We used a mix of ochres, sienna and umbras, five in all, to get a good 'aged' look to the floor boards. I mixed the pigment with an acrylic water-based varnish and then applied a couple of coats of clear varnish on top to seal in the pigment. The banisters and doors were tinted with the same pigments but I used an organic hemp oil as the medium. The linen and lime mortar on the walls had a rather cold grey look to it so I livened it up with the addition of two tablespoons of deep Sienna red per trug of mix. This gave it just the slightest hint of colour but it took the grey out of it. With pigments you really need to experiment and remember that the dry colour may be much paler. Your own unique colours do not come with a shade card but that is part of the fun. I always tend to do a trial demo on a scrap of wood or patch of wall where it won't be noticed!  Your pigments will also tend to follow the grain in wood so you can get some really lovely effects. 

Pallet wood hen house decorated with natural pigments

The garden is a great place for natural pigments. We mostly use pallet wood in our various projects and it is not the most attractive of timbers. Pigments can be employed with great effect and of course you don't need to worry about them harming the environment, your livestock or wildlife. I've used pigments on the hen houses and greenhouses with organic hemp oil as the medium and I've used them in acrylic paints on the pergola, pyramids, plant supports and planters.


The Bee Cosy for overwintering and hopefully taking for a long let. Finished with a water-based varnish and ochre pigment. The article on how to make this is insect hotel is here

Using natural mineral pigments in the garden
Using eco-friendly natural pigments in garden design

So many colours to choose from makes its easy to mix and match in the rose garden and then in the Winter the supports provide a welcome touch of colour.

Environmentally friendly garden design
Have fun!

If you enjoyed this article then please feel free to share it, comment and/or ask questions.

All the best and thanks for dropping by. 

Cheers, Andy

© Andy Colley 2014

RELATED ARTICLES

Home-made Ecological Paint for Interior Walls Part 1 Making Wheat Paste


Ecological paint, like a good organic food recipe is made up of just the basic necessary ingredients, it is simple ...read more

Home-made Ecological Paint Interior Walls Part 2 Claypaint

When the wheat paste was cool we were ready to go ahead with the next part of the process. We decided to add a little of our earth pigments, a red and yellow ochre, to avoid the grey tone that you can get with clay and flour paints...read more